Showing posts with label gail green. Show all posts

Tuesday, May 21, 2019

Hummingbirds...and away we fly on a creative adventure!

As I tentatively embrace spring (which, in Chicagoland, has been mostly non-existent so far), I'm reminded that summer cannot be far off.  And the arrival of summer also includes the Impression Obsession SUMMER stamp release! Yay!  I have some SUPER fun new stamps and stamp sets launching with this release.......

So, in celebration of SPRING (hopefully...finally...we need spring...), I'll start this new blog series with my brand new Hummingbird stamp set!


This is SUCH a fun set, I couldn't wait to start playing with it...

But first I had to narrow down exactly what I wanted to make.  And, if you know me at all, you know I usually don't just do traditional.  Nope.  I usually try to find new ways to use materials or change up techniques so they have a new "spin".  So, yep...you guessed it!  I went renegade before I even opened the Hummingbird set packaging.  LOL!And away I flew on another creative adventure!

When I went to grab my Strathmore Bamboo notecards, I accidentally grabbed a stack of the coordinating envelopes instead. That's when the light bulb went on and I decided to try making a card out of.....an envelope.

Here's how:

After carefully opening up the envelope and trimming off edges with remnants of adhesive, I opening it up flat on my stamping table.  Then I stamped the hummingbird and lily cluster on the left panel, using Clearsnap Wicked Black Archival ink, as shown:


I continued stamping lily clusters and other floral elements from the set as shown:


Next I stamped another one of my new phrase stamps (Bird Sings)...inside the center panel of the card...


Next step was to color the images using a combination of Derwent watercolor pencils and markers. 


I loved the way the colors harmonized so well but...it just needed a finishing touch.  I wanted to keep it simple so I added a simple gold trim on the underside of the left panel and a simple pink cord along the edge on top .  Beacon's Fabri-tac Adhesive made it super easy!


This Hummingbird set can be used in SO many different ways...this is just one of them. 


Here is the finished project!!!


Thursday, October 4, 2018

Ice Cream is for EVERY Season!

Just because summer is leaving us behind, that doesn't mean we can't still enjoy an ice cream treat or two over the next few weeks.  Of course, if you are like me, the fewer calories and sugar, the better! What better way to accomplish that goal than by STAMPING and coloring in ice cream treats cards.  

Just Chillin' with Treats: 
Stamp F7936 Sweet Treat Border on watercolor or bamboo cardstock scrap using a Wicked Black Colorbox®️ Archival Dye ink pad. Color the image with markers; blend colors with wet paintbrush. Stamp C7956 Just Chillin' on white cardstock scrap using Colorbox®️ Archival Dye ink pads (Pinkolicious, Frosted Plum, Glacier Lake). Attach layers as desired to pink notecard.


Both  of these cards are quick and easy to stamp.  The images I used are some of my latest stamp line releases with Impression Obsession Rubber Stamps. Ink is from Clearsnap. Images are colored with Derwent Academy Water-Soluble Markers.  Layers attached to the cards with Beacon Zip Dry®️ Paper Glue. 


Kindness Cone:
Stamp C7954 Kindness Calories on a pink cardstock scrap using a Wicked Black Colorbox®️ Archival Dye ink pad. Stamp E7961 Ice Cream Cone on white cardstock scrap; color image with markers, blending colors with wet paintbrush. Crumple a manilla tag; flatten out.  Using Direct-to-Paper technique, press Colorbox®️ Archival Dye ink pads (Squash, Coral, Saddle, Mudslide) onto tag; dry. Attach layers to brown notecard with Zip Dry®️ Paper Glue.


Now...wasn't that refreshing?  I would LOVE to hear from you!  Let me know how you liked these projects by leaving a comment!

Wednesday, September 19, 2018

Explore the Kaleidoscope Embossing Technique!


Explore the Kaleidoscope Embossing Technique! 

This easy inky technique will help you create realistic images that resemble a dimensional painting!


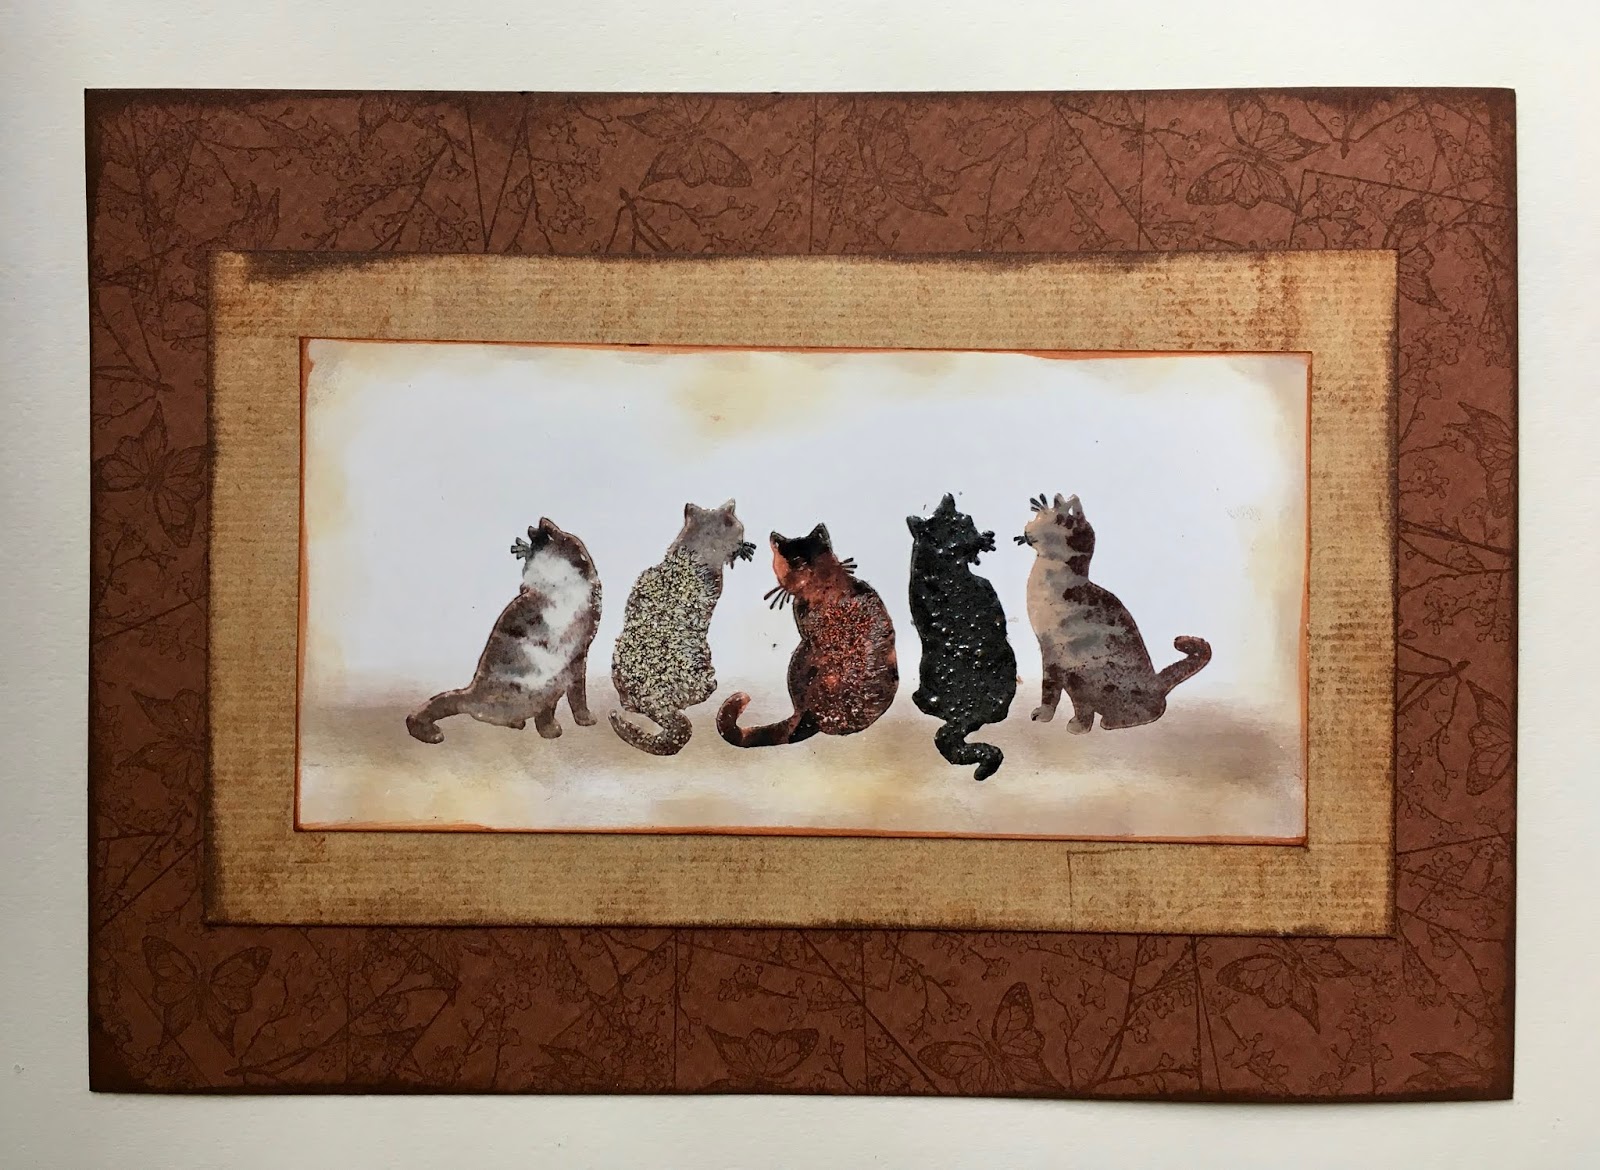
Same technique for both cards but the card below also includes the textured Baked Texture Embossing Powders...and different Impression Obsession stamps for a slightly different background.


Cats in a Row Cards

Supplies:

Impression Obsession Rubber Stamps 
E7983 Black Cats 
3160-LG Twinchies 4
G7762 Leafy Branches

Clearsnap
Colorbox®️ Petal Point Classic Pigment Inkpad (Arboretum, Metallic)
Colorbox®️ Embossing Powder (Clear)
Top Boss®️ Embossing Stamp pad
Colorbox®️ Archival Dye ink pads: Mudslide, Saddle, Seattle Sky, Putty, Wicked Black
Art Daubers

Beacon Adhesives
Zip Dry®️ Paper Glue

Emerald Creek

Baked Texture Embossing Powders by The Altered Page (Dirty Sand, Ancient Amber, Rocky Road, Chunky Rust)

Heat tool
White, tan and brown cardstock


Instructions:


Version 1
  1. Remove desired color sections from the Petal Point ink pads. Using the tip of each section, apply ink directly to the Black Cats stamp, blending as desired. 
  2. Stamp image onto 3” x 6 1/4” white cardstock. Pour clear embossing powder over image, tap off excess. Heat until melted.
  3. Apply Putty around edges direct-to-paper (DTP) by angling inkpad and pressing repeatedly off the edge in a random pattern. 
  4. Using an Art Dauber, apply Saddle around the edges of the card. Place the short card edge onto the Mudslide inkpad. Angle slightly and quickly pull the card edge across the inkpad. Repeat for all 4 edges.  
  5. Trim, score and fold tan cardstock to create a 4 1/4” x 7 1/2” notecard. Stamp Leafy Branches in a random pattern around the front of the card.
  6. Using Zip Dry Paper Glue, attach layers.


Version 2 (with Baked Texture Embossing Powders added)
  1. Remove desired color sections from the Petal Point ink pads. Using the tip of each section, apply ink directly to the Black Cats stamp, blending as desired. 
  2. Stamp image onto 3” x 6” white cardstock. Carefully pour on the Baked Powder colors and textures in sections of your choice.  Carefully tap off excess powder. (Note: Less is more!) Pour clear embossing powder over remaining sections of the image, tap off excess. Heat until melted.
  3. Using an Art Dauber, apply Putty and Seattle Sky across the bottom edge of the card, as shown. Add Putty and Seattle Sky lightly around the edges, as well. 
  4. Place the short card edge onto the Saddle inkpad. Angle slightly and quickly pull the card edge across the inkpad. Repeat for all 4 edges.  Repeat this step to apply Mudslide around the edges.  
  5. Apply Saddle to 4” x 7” tan cardstock direct-to-paper (DTP) by wiping inkpad across. Add Mudslide and Wicked Black to edges using the DTP method in step #4
  6. Trim, score and fold brown cardstock to create a 4 1/4” x 7 1/2” notecard. Using Wicked Black, stamp Twinchies 4 butterfly images in a random pattern around the front of the card.
  7. Attach layers to notecard with Zip Dry Paper Glue.

Tuesday, May 29, 2018

Add Drama to Stamping with Colored Pencil Techniques

Have you ever colored your stamped images with colored pencil and been disappointed with the results?  

Well...that is all about to change!  Just keep reading....


I have recently been experimenting and perfecting THE COOLEST color pencil technique ever!

All my stamp images are from Impression Obsession and can be found here.


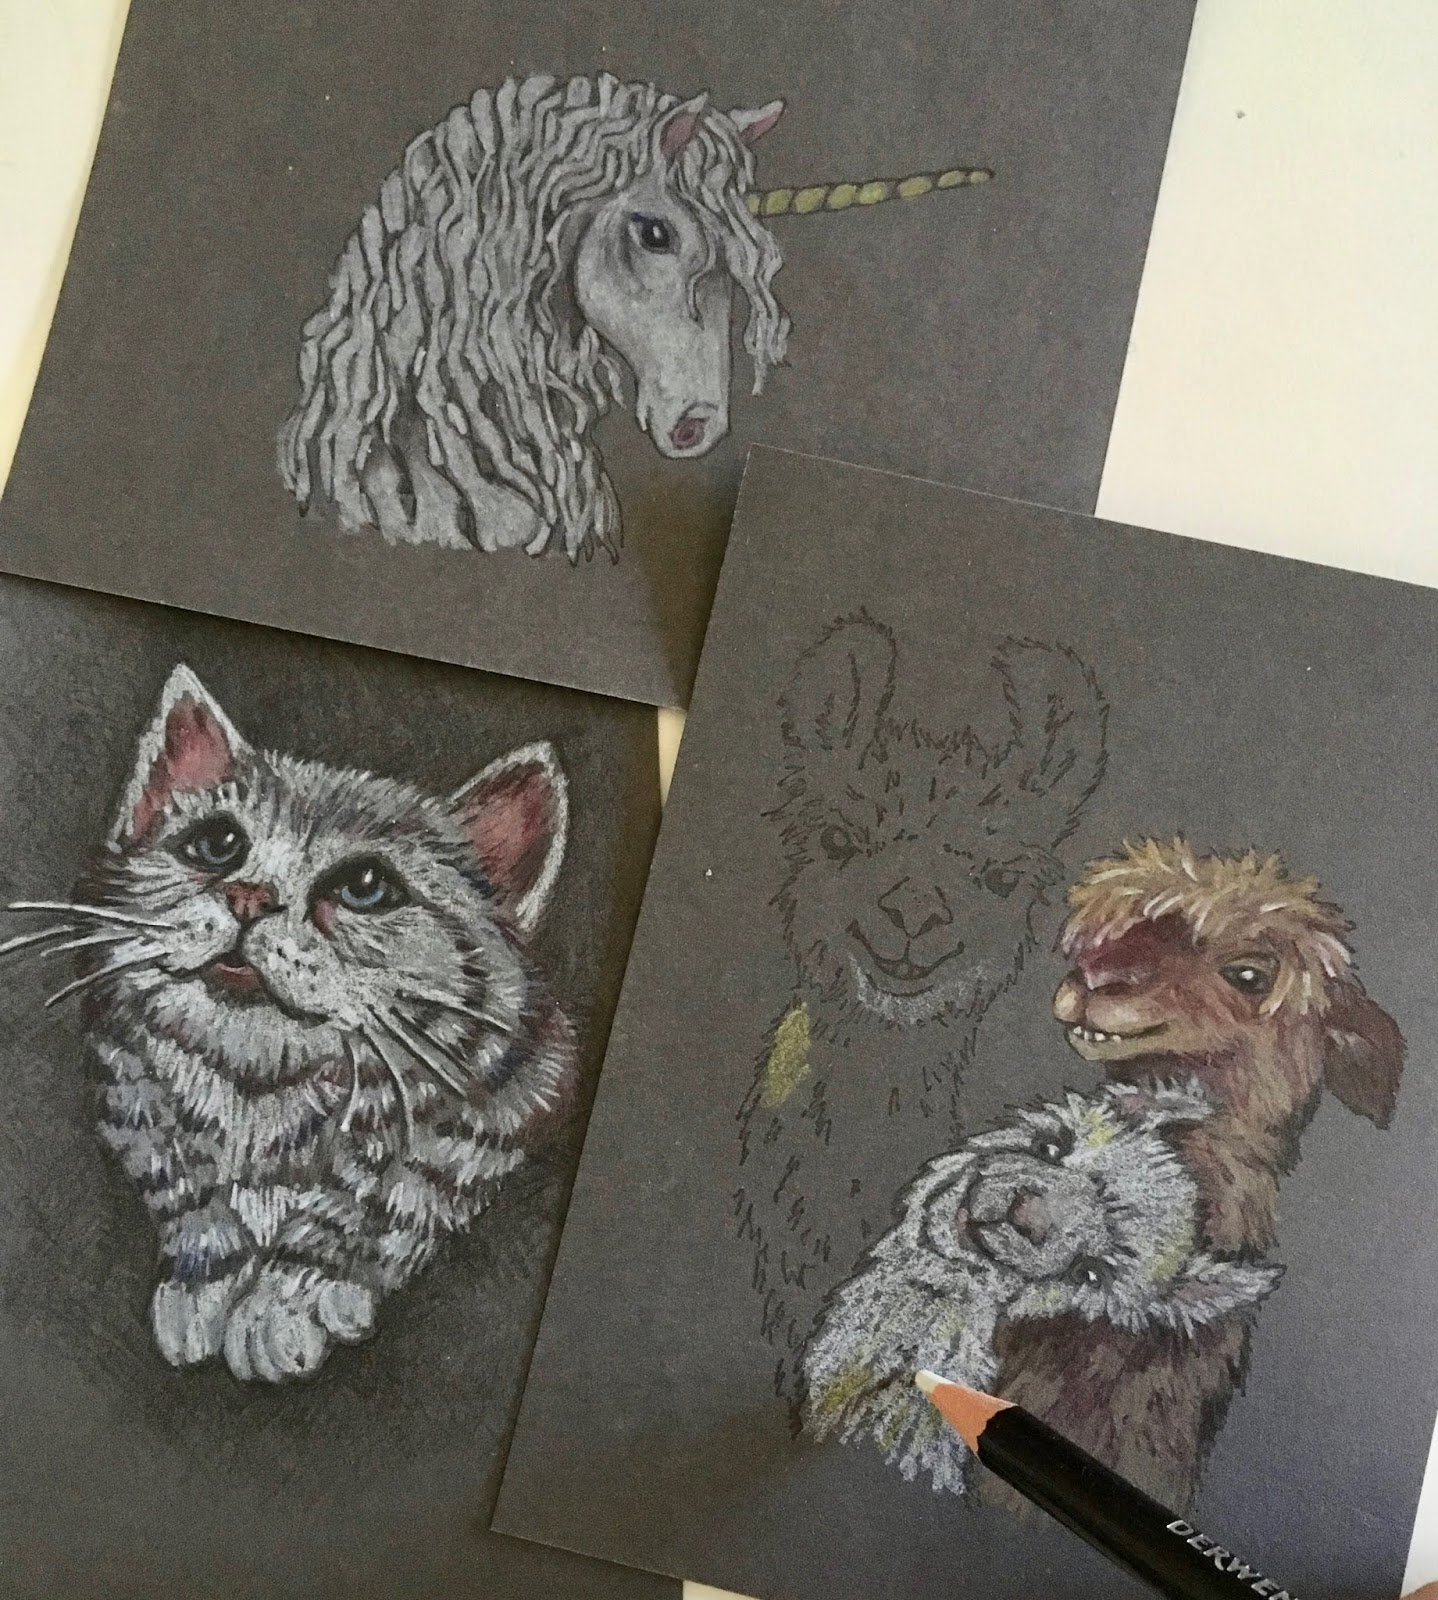
It all started as a simple serendipitous "surprise". I had stamped an image on a dark grey cardstock scrap. Yep, that was it.  I then had one of those "oh no, what do I do now" moments when I realized DUH,  how do I now add color?

Most typical coloring mediums used with paper crafts (like ink, marker and watercolor) are transparent. They don't work at all on dark surfaces.  And, while most opaque mediums like acrylic paint, pigment ink and pastel will show up on the dark cardstock, they also obliterate outline and detail lines on my stamped image.

So....I'm thinking what to do...what to do.....and then POW! Light bulb moment. How about colored pencils?! 

I quickly pulled out ALL my colored pencil tins and started experimenting with the different brands and types I had available. (Why I actually have so many different brands and types is a WHOLE other story in itself.)

 And, WOWZA!  This translucent medium really pulled it off.  Actually, more than just in an average kind of way. Truth is....they were AMAZING!


All my stamp images are from Impression Obsession and can be found here.

Colored pencils are the best of all worlds.  They work by adding translucent layer upon translucent layer until you get the color and intensity you want.  Each layer is affected by the layer beneath...and that includes the color of the substrate used beneath that very first layer. 

Then came the experimenting as I quickly discovered not all color pencils perform the same on all substrates.  Different brands AND types can work very differently.  Some are harder, some softer. Some pencils wind up with a waxy buildup (called "bloom").  The pencils in some brands and product lines seem to lay down more intense color while others need more layers to be built up for that intensity.

And then there is the variable of the actual colored cardstock.  Uncoated cardstock worked the best.  I found smooth cardstock has better results than textured cardstock simply because the stamped image is crisper plus the colored pencil often won't attach well to the indentations and grooves in the texture. Cardstock color and value (dark, mid-ground, light) will also affect the color pencil results. So, it is best to test your color palette on a small cardstock scrap before beginning an actual project.

Here comes the REALLY cool part:  You do NOT need to be an "artist" to try this technique.  And I mean you will SUCCEED when you try it!  All you need is to know basic color theory, ie, blue + yellow = green.  Primary colors are the basis for everything (red, yellow, blue)  secondary colors are made by mixing two primary colors (orange, green and purple) and complementary colors are opposite each other on the color wheel. That's it, kids. And, surprise....using a rubber stamp image even eliminates the need to be a skilled sketch artist.


All my stamp images are from Impression Obsession and can be found here.

However, I do understand that many people may still be a little intimidated by colored pencil. Since my experimenting I have developed steps to this technique that will give you confidence and insure your success. 

This first tutorial is only covers stamping and coloring on a very NEUTRAL cardstock...dark grey.  By using a dark grey "ground", we have already laid in some of the tonal shadows.  This is the perfect cardstock to choose when using images that are lighter in tonal value.

All my stamp images are from Impression Obsession and can be found here.


Here are a few tips:
1. Begin coloring using the LIGHTEST color....normally WHITE, followed by light grey, light tan, light yellow, blue, green, pink or whatever colors your piece will be.  Add your lightest and most striking highlights first.  Where desired, the highlights can cover up the stamped outline or detail.
2. Start laying in your DARKEST shadows next.  But...not everywhere.  Just where they will be the darkest.  You will add more shadow layers later.
3.  Start building layers of your mid-tone colors, adding color on top of color until you get the intensity and shade you want.  Add your lighter and deep colors again in some of the layers so they become embedded or sandwiched in between color layers.
4. End by adding a few more strokes of white highlights...and the darkest of dark shadows.
5. If you want to get "artsy" really quick, create your deep shadow tones by adding the complementary color instead of just adding black. Then add layers of the other two primary colors to blend So, basically, you add shadows using the colors MOST unlike the color of the item you are adding the shadow to.  if you add shadows to a green leaf (green is made of blue + yellow), you will also use a deep red layer to create a richer shadow. Blend with a little purple and add a little orange if desired.  Conversely, if you are adding shadows to a purple item, you should add yellow but also add the dark green and dark red to blend.  You will get the hang of it once you start experimenting.
6. Best tip is to do "practice pieces" on cardstock scraps.  I have found that the simple act of making something that "doesn't count" before doing  the final piece where there can be no mistakes, often frees up our ability to take risks and just "flow".

All my stamp images are from Impression Obsession and can be found here.

Next time on the blog, I will go into more detail covering colored pencil on amid-range colored cardstock.

All stamp images copyright by Gail Green LDL/Impression Obsession.  All content on this blog post and all posts on this blog copyright Gail Green.  Do NOT copy or use any of this content without written permission from the author and artist Gail Green.  

Friday, November 11, 2016

Interesting how I don't post much in summer because I just don't want to lose any of that precious time outside. But, the moment it starts to feel and smell like fall, I return to my regularly scheduled blogging.

So this post will be more of a social experiment than the usual sharing photos, events and updates in the lives surrounding the Green Family Craft Zoo. Mainly because this week has had drop dead gorgeous fall weather which we all know will soon come to a screeching halt, slowdown and then....end in the world again turning colorless in shades of white, black and grey.

And so I ponder, as I look outside and marvel at the brilliance of autumn...the psychedelic trees and all the orange, red, brown and yellow leaves scattered over all the beautiful green grass. Fall is one of my most productive seasons to create art because I am surrounded by color on my walks and I am inspired by the color palette when I return.  Which is why I am always sad to see the color slowly fade and disappear.


 Do we really say goodbye to summer and fall with the turning of a calendar page or the changing of the clocks? Or can we hold on to it in our hearts and experiences? In my case, I hold onto summer in my still healing broken toe...but also in the videos and photos that capture the sights, smells and sounds of nature (OH SO MUCH GREEN all around me!) and outdoor festivals, events and fun times.

Sunday, November 6, 2016

Saying Goodbye to Summer...

The summer of 2016 has been a relatively peaceful one in the Green Family Craft Zoo.  Lacy Lulu has settled down and has become a delightful dog instead of a crazy psycho puppy.


Tux is still holding his own at 14.5 years old, although he is pretty much deaf now and only responds to sight commands. Thankfully he can still see pretty well! (And this, folks, is why it is crucial to teach hand signals simultaneously with the commands to sit, come, stay, etc!!!)


And Maggie...well, Miss Maggie still barks too much but she is also aging gracefully.

Actually Miss Maggie gave us quite the scare this summer.  An undetected insect bite sent us to the emergency vet with her. That was QUITE an infection!  She wore that soft cone of shame for weeks! And, the fur still hasn't completely grown back.  She currently looks like an ad for Target!


Summer has been good.  Bittersweet, though, to see it turn cooler and days getting shorter.  I wish I could just hold on to summer....make it last longer.  But, I can't.  So I will remain hopeful that the next several months will be kind to us in Chicagoland and spring will arrive at the expected time.


Monday, July 25, 2016

The past few weeks have been super busy and even though I keep meaning to post, I basically got so sidetracked with the gorgeous weather, I didn't.  Oops...my bad....

Now the steamy heat has made its way to Chicagoland, I'm staying inside a little more and should hopefully be posting more frequently.  Well, at least more frequently than every 2 months...that's for sure!

One of my goals is to post projects and techniques that have been published in Scrap & Stamp Arts magazine.  Here is one to start....stay tuned!


Tuesday, March 1, 2016

Super Nova Craft Explosion!

Most people dread deadlines. Ok some types of deadlines fill me with dread and the instant desire to find ways (ANY ways) to procrastinate.  Like doing taxes or making a doctor appointment.  But....deadlines that involve creating art or writing articles filled with lots of creative projects fill me with an instant desire to move full throttle into high creative mode!

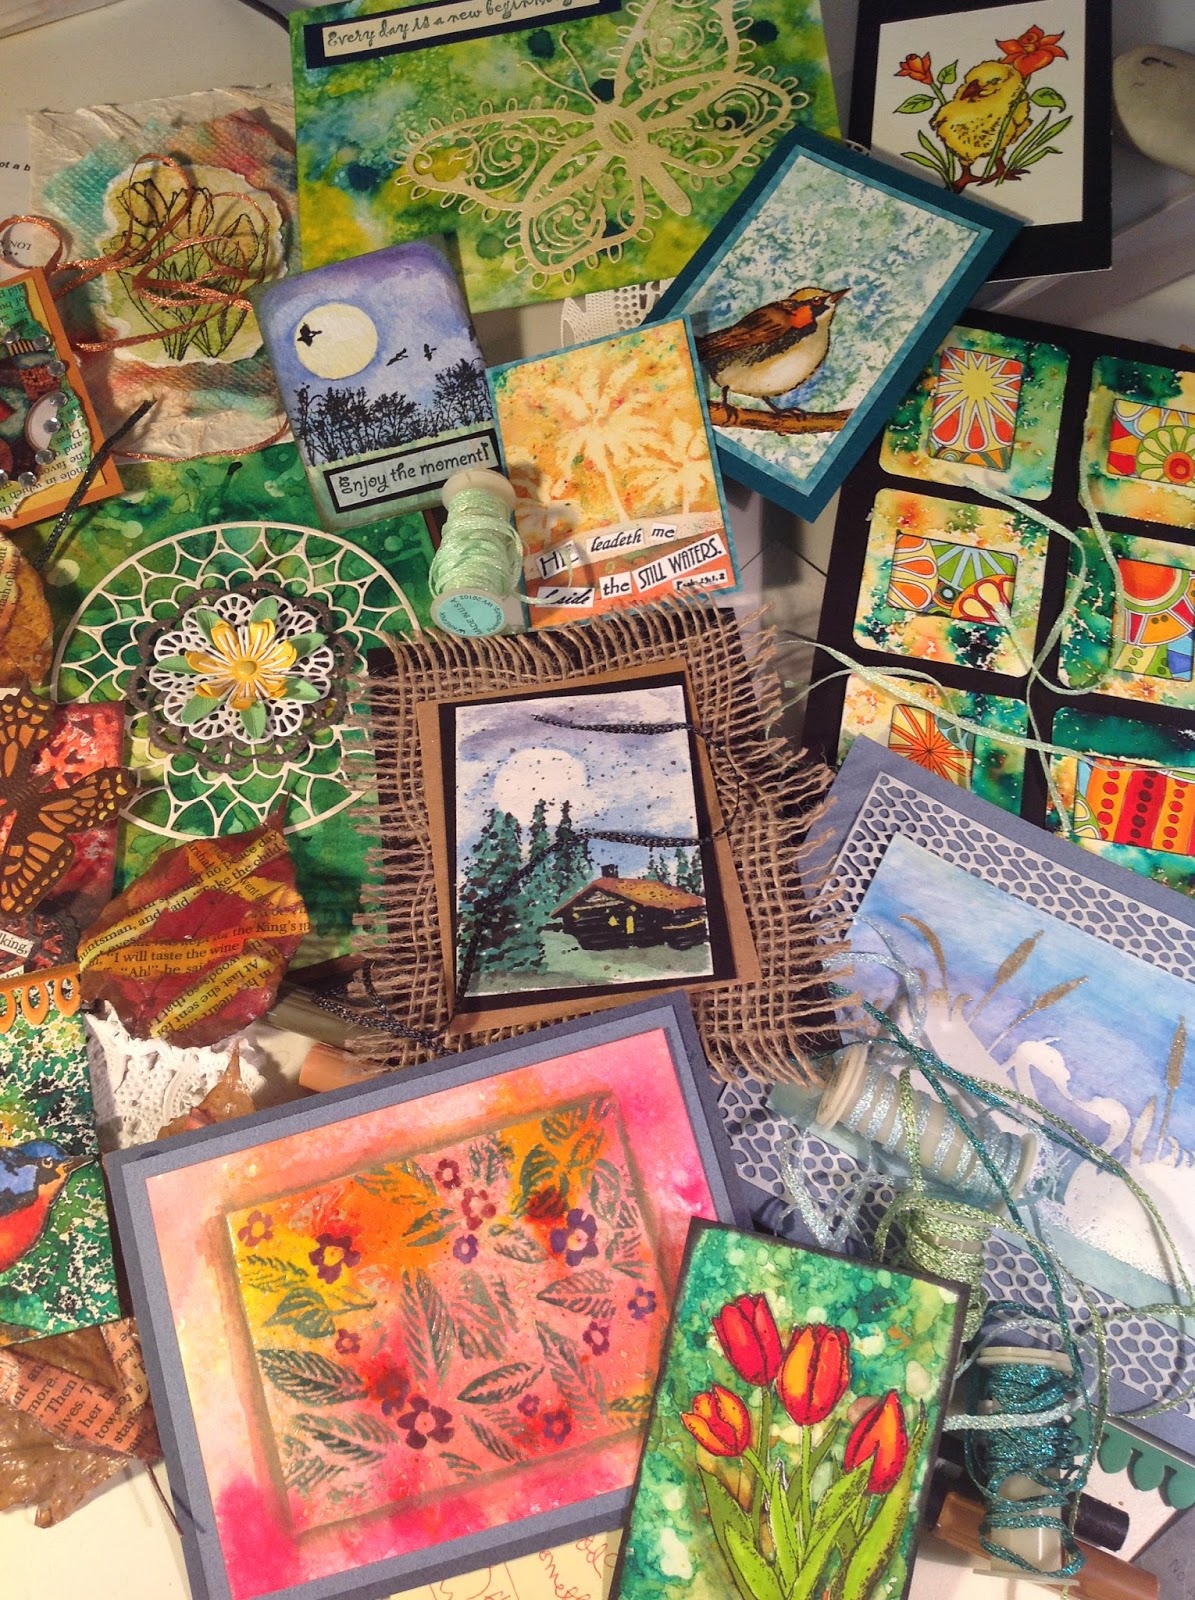
Which is exactly what I did this past weekend.  Two magazine articles and multiple projects for a third magazine later...this is what just a corner of my craft room looked like....


And another corner.....the spillover still in process to be completed this week....


IT IS a SUPER NOVA CRAFT EXPLOSION!  Wowza....


Keep your eyes out for Scrap & Stamp Arts magazine.....and Just Minis, a brand new magazine!

But meanwhile, check out the latest issue of Scrap & Stamp Arts magazine www.scottpublications.com/ssa/  and Just Mixed Media! scottpublications.com/jcmag/ for some of my latest published creations.....

And, of course in addition to the images above, check out more of my latest stamps at Impression Obsession.... iostamps.com ...Just search under Rubber Stamps > By Artist> Gail Green and you will see all my cool images!


Sunday, September 27, 2015

Welcome to Autumn with a Bittersweet Farewell to Summer...

As summer quietly comes to a sweet end, the days grow shorter, the evenings cooler and the garden starts to fade....

Sounds like the lead into a welcome to fall speech, doesn't it?  Truth is....I'm NOT ready to welcome fall! Chicagoland had such a brutal endless winter, last year, followed by an equally long, extended spring (all the way into July with rainy, cool and gloomy weather). As far as I'm concerned, summer is only halfway done! No fair! I'm not ready for leaves to turn colors and fall.  Nope.  I want those suckers to just stay put and stay green.

But, when I peek at my sad garden, I can see the party is almost over.  No matter where my heart is (and, trust me, it is still heavy and deep into summer), nature has another plan.  The dogs are blowing their coats in preparation for their heavy winter coats to grow in.  The giant Hibiscus are finally bloomed out and their leaves are already starting to change.  And, dislike as I may, the sun now sets by 7 pm....way, way too early for summer but nowhere as early as it will be setting another month from now.

Sigh.....

So, I need to tough it up, pull on my big girl winter pants and brace myself for the change. Reluctantly I admit I only used the outside grill once because we just aren't really into that type of food.  When it gets warm, we get lazy and eat cold salad type fare.  We are more the peasant pot of soup type of family. ..which is not a summer choice.  Fall means dusting off the big soup pot, harvesting all the parsley that has recently totally taken over the garden and getting ready for the next big adventure.  And that adventure will most certainly include LOTS of thick, hearty soups!

So....love you Summer. with all my heart...miss you madly until next year.  I will rejoice with each and every remaining warm day.  But, I do need to look forward to the next chapter.  So, without further adieu, I have taken a deep breath of this cool, refreshing air and now welcome an old friend back in all her colorful splendor....

Happy Autumn!  Stick around as long as you like and don't let your frigid sister arrive on the scene too soon this year....

And...please take little trip over to my ETSY shop.  I'm in the process of loading fall and winter seasonal items for your viewing and gift buying pleasure.  Many of these items are one-of-a-kind handcrafted pieces that were made by my little ole hands from my little ole original patterns and designs.  Once they are gone...they will be gone.  The name of my ETSY shop is Sweet Petatoes.  Here is the link: http://sweetpetatoes.etsy.com

Both photos here show just a couple of the one-of-a-kind items currently listed in my ETSY shop. Oh there are just SO many other item, including scrapbook kits, photos albums, dog and cat notecards from my original realistic line art...and more to come as the weeks progress.

Till next time....


Monday, September 7, 2015

Celebrating Labor Day in Style....working....

Hope your Labor Day weekend was a great one!  IMHO, it doesn't matter what you do as much as doing what you enjoy.  And, since I love crafting, creative play AND meeting publishing deadlines, it is always a good day when I can say I'm almost ready to turn in a manuscript (complete with cropped/adjusted photos)...on time.

Besides, the holiday began with vertigo.  Yep, vertigo, my favorite debilitating condition that renders sleep or movement impossible.  Plus it was too hot this weekend to want to be involved with all the outdoor activities I would have enjoyed.  Sad I didn't get to the Renaissance Faire again this year but, frankly, the season is way too short and overlaps other summer commitments and extreme heat.  Too much traffic to drive into the city to see that stinkin" cute grandbaby and family.  Totally over-the-top decibel level at local festivals for a sound sensitive person like me.

So it was basically easier (and much cooler and quieter) to remain inside getting all inky as I progressed through the projects and then tackled the easy part--writing a feature article with full-on step by step instructions.

Fortunately the vertigo is currently under control so I actually slept the past two nights...two in a row...yay!  Our unseasonably hot temps will return to a more comfortable level in a day or so, making outdoor activities fun again.  Unfortunately, the Renaissance Faire is now officially ended so I will just have to hope again for next year.

Truth is, I don't really like celebrating the end of summer.  Ok, I said it. That is probably the real reason I hide away from even acknowledging this holiday.  Labor Day is symbolic for the end of summer and the anticipation of all that is coming in the form of cold, dry air,  snow,  ice and subzero temps that make outdoor activities uncomfortable and downright impossible.   So I pretended this weekend was just another hot summer weekend where I could stay indoors during the hot parts and create away. Tomorrow is back to routine...editing photos and turning an article in (happy dance!)....and being thankful I can choose to work or not work on a holiday weekend.  There are many who don't have those choices....


Saturday, August 22, 2015

Ollie

Ollie, poor Ollie is stressed to the max with his computer office being changed, power/USB cords (aka SNAKES) moving all over the place on the weekend,  furniture moving itself around and his cage rotated 90 degrees to accommodate the new cross platform set up in here.  It is quite cozy however.  He still sits right  near me and can see the monitors and all the pretty colors going on.


As soon as I get the basics down, I'll be moving into PS Creative Cloud 15 and downloading my trial version....   Can't wait to see all the new features....

Tuesday, August 18, 2015

Brat

After almost 4 months of nonstop PC computer, internet, modem,  and router problems...plus battery backup battery deciding to die in the midst of all of the program malfunctions, unexplained power blips and surges..and Acronis highjacking nightmares, I am now the proud owner of a sleek new iMac.  Okay, the modem and routers are still being affected periodically by Comcast pushing new ISP numbers through weekly and causing signal malfunctions but at least I know how to correct them now. And weekly power blips and surges are still a mystery (at least,according to Com Ed, despite special town hall meetings with dozens of angry users).  Battery has been replaced and we are still trying to completely resolve the Acronis issues but....

I have a pretty new iMac.  And I'm learning this new platform as quickly as my ole brain allows.  Also as quickly as I can in the time restraints I have to deal with since I STILL spend some time almost daily with random internet, modem, power blips, etc.  At least I am no longer spending ALL my time dealing with these issues.

My biggest fear was that my PC wouldn't cooperate long enough to allow the Apple tech to transfer data to the new iMac.  In fact, it totally malfunctioned 20 minutes after I got the call that the new computer had arrived at the Apple Store and they were ready for me to bring in the PC. My plan to bring it in that evening fizzled when the PC froze (yet again) when I tried to shut it down.  By the time I did the hard shut down, rebooted to make sure it still functioned and hadn't just totally crashed and then shut down again, it was too late.  The theme of the entire summer....spending ALL my time dealing with a tantrum throwing, misbehaving computer.  And so I loaded the PC in my car in the morning, took one look at it and told it  to BEHAVE!  And realized yes, now I'm speaking to my computer because it has been behaving like a total BRAT!

And that is how Brat got its name.  Very fitting, eh?


Saturday, May 9, 2015

It is SUMMERTIME in Craft Chicagoland! Just in time for Mother's Day.....

Hi all!

Warm weather has finally arrived this week here in Chi-town....which means it is summer outside.  Yay! We kind of bypass spring here and usually go right from winter (which has been waaaaaaay too long again this past season) into the toasty warm summer temps.  With rain mixed in, of course. And everything blooming on hyperdrive and all at once.


Both of these events address the reasons I haven't posted in the past week or two.  Yes, I've opted to spend the time outside instead of inside on my computer blogging. (Can you blame me after the winter WE just escaped from?!).  It's been so amazing not wearing winter gear (heavy coats, hats, gloves, the works) and breathing in air that doesn't burn my lungs.  So yes, I have to say opportunities to walk outside have definitely trumped computer time indoors.

If you don't suffer from seasonal or other environmental allergies, this next reason probably won't really resonate with you.  Basically, it's been tough to see clearly through itchy, watering (and very irritated) eyes.  Whatever I'm mainly allergic to every spring was apparently mega-dosing the past couple weeks. Even with windows closed as much as possible, both humans and dogs brought pollen and other allergens right into the house each time anyone stepped outdoors for even a few minutes. Staring at a computer monitor had to be limited to "deadlined" projects and  necessary tasks.

The misery lasts until it rains and washes much of the mess out of the air and keeps it trapped on the soggy ground.  Which happened yesterday evening so....here I am!  Perhaps relief only for a day, but I'm enjoying the respite, nonetheless.

HOWEVER....allergies and outdoor fun has not stopped me from creating new art or crafting new projects! Or creating a sale in my Etsy shop!  25% off ALL original art dog, cat and wildlife note cards!  Visit www.sweetpetatoes.etsy.com to visit my shop.  Lots of items listed...from scrapbook kits to handcrafted one-of-a-kind silk ties.

If you have not done so yet, please drop by www.mixedmediaart.net and take a peek at my debut article on the blog.  It is under the Product Review Section but you can just search on top under my name Gail Green and the article will pop up.  Or try this direct link......http://www.mixedmediaart.net/?s=gail+green

And, in the spirit of the season, here's one of the projects in the blog article....


I also have another project posted on the Linnie Blooms Design Team Blog....it's pretty cool so take a jog over to that site, as well... www.linnieblooms.blogspot.com

For more info on Linnie Blooms products, visit their website.


Another article will be posting sometime next week...

Have a Happy Mother's Day!


Monday, June 8, 2009

July will be a double-header trade show month!

May's Stationery/Surtex and BEA shows now belong to the past. Although I was not able to attend these shows this year, I am now looking forward to two other shows that I will be attending. Since BEA (Book Expo America) no longer travels to Chicago, I'm thrilled that ALA (American Library Association) will be holding their yearly summer conference here at McCormick Place in Chicago. And what perfect timing! This conference actually coincides with my book launch for Animals and Teens: The Ultimate Teen Guide.

Soooo....I'll be signing books and promoting my school visit/library programs at the SCBWI booth (#1626) on Sunday, July 12 from 3-5 pm. Plus I'll also be hovering periodically in my publisher's booth (Rowman & Littlefield/Scarecrow Press) on both Saturday July 11 and Sunday July 12. I might just have a freebie to pass out....so please stop by if you'll be at the show!

But wait...there's more! At the same time I'm developing my school/library program brochures and hand outs for ALA, I'm also creating 3 days worth of "make it-take it" projects for the summer CHA show! YES, that's right...I'll be demoing and teaching marker blending techniques for at the Tombow booth at the summer CHA show! Woo hoo! Orlando here I come!

More info on these two shows later...