Showing posts with label craft technique. Show all posts

Thursday, August 9, 2018

Floral Etched Glass Vase


Floral Etched Glass Vase


A simple dollar store glass vase can turn into a stunning collector’s piece in just a few minutes with etchall Etching Creme!


You will need:

etchall Etching Creme and squeegee
Large plastic container of water
Clean dry paper towels
1 large squared glass vase with flat sides
Contact paper 
Diecut machine and floral die of your choice (I used Sizzix Big Shot and Vine die)

Optional: Faber Castell Gelatos in colors of your choice and makeup sponge applicator


Here’s how:

1. Prepare your work surface. (Note: I used a combination of protective surfaces to do my project so I could photograph each step.)  Wash and dry your glass vase.   


2. Cut the vine (or other floral shape) from Contact paper.  (Note: I added a layer of cellophane to the back of the Contact paper to add stability/thicknesss and prevent sticky residue from adhering to my die cut machine.) You can do this by using a die and die cut machine OR cutting a shape by hand.


  You will have both a positive vine shape AND the negative vine piece.  For this project, you will use the negative vine.  (Note: Save the positive vine shape to use for another project!) 


3. Place the negative vine on the vase, positioned as desired.  


    Burnish securely to the glass with the squeegee.


4. Apply a generous amount of the etchall Etching Creme over the exposed areas of the slide.  Set aside for 15 minutes for the etchall Etching Creme to do its magic!


5. After 15 minutes, use the squeegee to remove the etchall Etching Creme and return the creme into the container.  Yes…the etchall Etching Creme can be used over and over and over again!  Amazing, isn’t it?!  


6. Carefully remove the negative vine and wash the glass thoroughly in a large plastic container of water.  Dry well. 


7. If you want a simple vase, you can stop here. 


8. If you want a second vine on the opposite side of the base, repeat steps 1 through 6 on the opposite side.


  Add a parrot to the display and…voile!  Instant rainforest decor! (Just kidding!)

Note:  Many of you who follow my blog are already acquainted with Ollie, my crafty companion.  One of the wonderful things about etchall Etching Creme is there are NO toxic fumes and it cleans up so easily!  Ollie watched the entire project taking place and voiced his approval many times during the process.  He is trained to “not touch” and was returned to his cage during any step that might have had potential risk to his safety and impulse control.  He was so excited to be part of the photo shoot he stepped right off my hand and on top of the vase to pose for the camera!


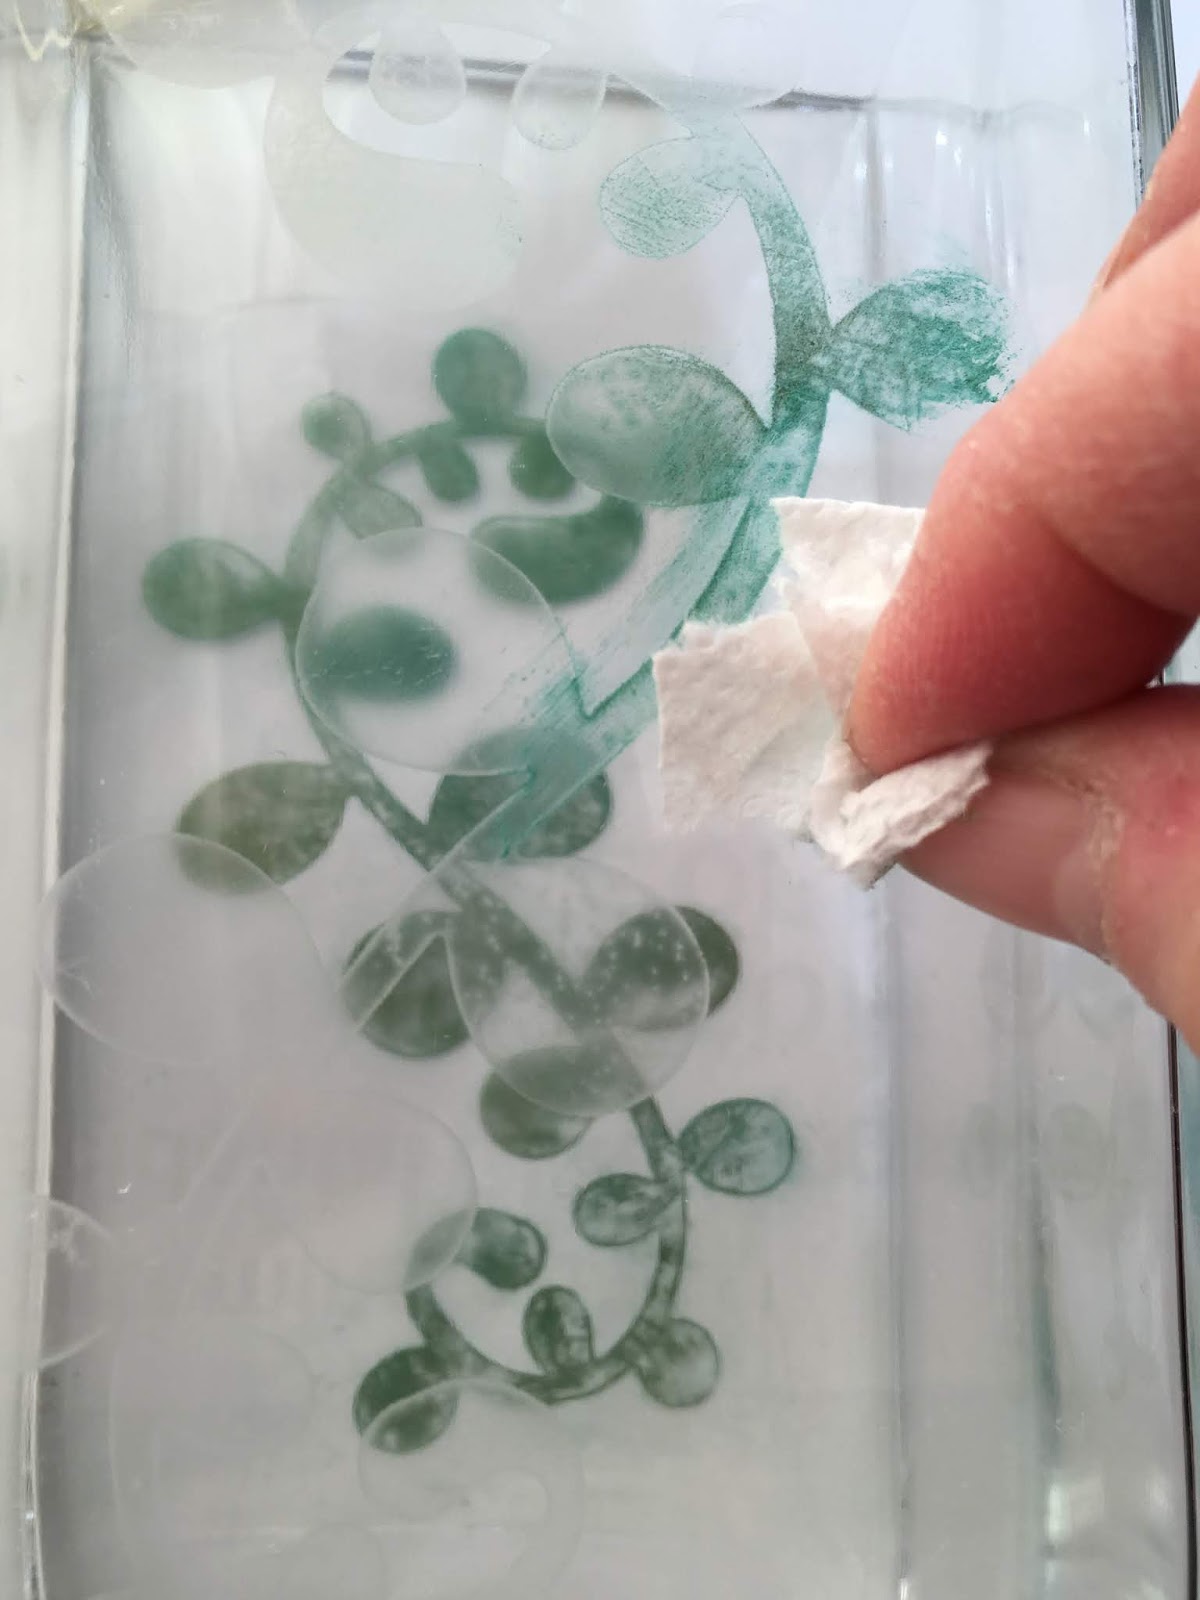
9. Creative Options: Take this gorgeous etched design one step further by adding color onto the etched areas.  


    Apply Gelatos of your choice by rubbing them onto the etched vine sections on the vase.  


    Allow to dry for about an hour and gently wipe off excess color.  


Disclaimer: Since the etchall Etching Creme etches porcelain, as well as glass, please do not use the creme or rinse the project in a porcelain or fiberglass sink or surface.  The best surfaces to use when doing these projects are plastic or stainless steel.

Thursday, July 12, 2018

Etched Glass Necklace


Etched Glass Necklace

Transform a simple microscope slide into a beautiful necklace pendant!


Etching glass changes more than just turning a transparent material into a translucent one.  It also changes the surface texture to become receptive for a variety coloring mediums. While this pendant can also be an outstanding statement in simplicity, you can also go one step further to jazz it up a notch by adding pops of color with metallic pencils.


You will need:

etchall Etching Creme and squeegee
Plastic container of water
Clean dry paper towels
2 glass microscope slides
Plastic shipping tape
Metallic colored pencils in colors of your choice
Felt, leather or other backing material of your choice.
Adhesive for glass that dries clear 
Cord in the length of your choice


Here’s how:
  1. Prepare your work surface. (Note: I used a combination of protective surfaces to do my project so I could photograph each step.)  Wash and dry your glass microscope slides.
  2. Cut narrow angled strips of shipping tape that are wider than the microscope slide.  Position and attach to one of the slides, as desired.  
  3. Burnish the strips securely to the glass with the squeegee. 
  4. Apply a generous amount of the etchall Etching Creme over the exposed areas of the slide.  Set aside for 15 minutes for the etchall Etching Creme to do its magic!  
  5. After 15 minutes, use the squeegee to remove the etchall Etching Creme and return the creme into the container.  Yes…the etchall Etching Creme can be used over and over and over again!  Amazing, isn’t it?!  Remove and discard the tape strips and wash the glass thoroughly in a plastic container of water.  Dry well.  
  6. If you want a simple pendant, you can proceed straight to step 7.  
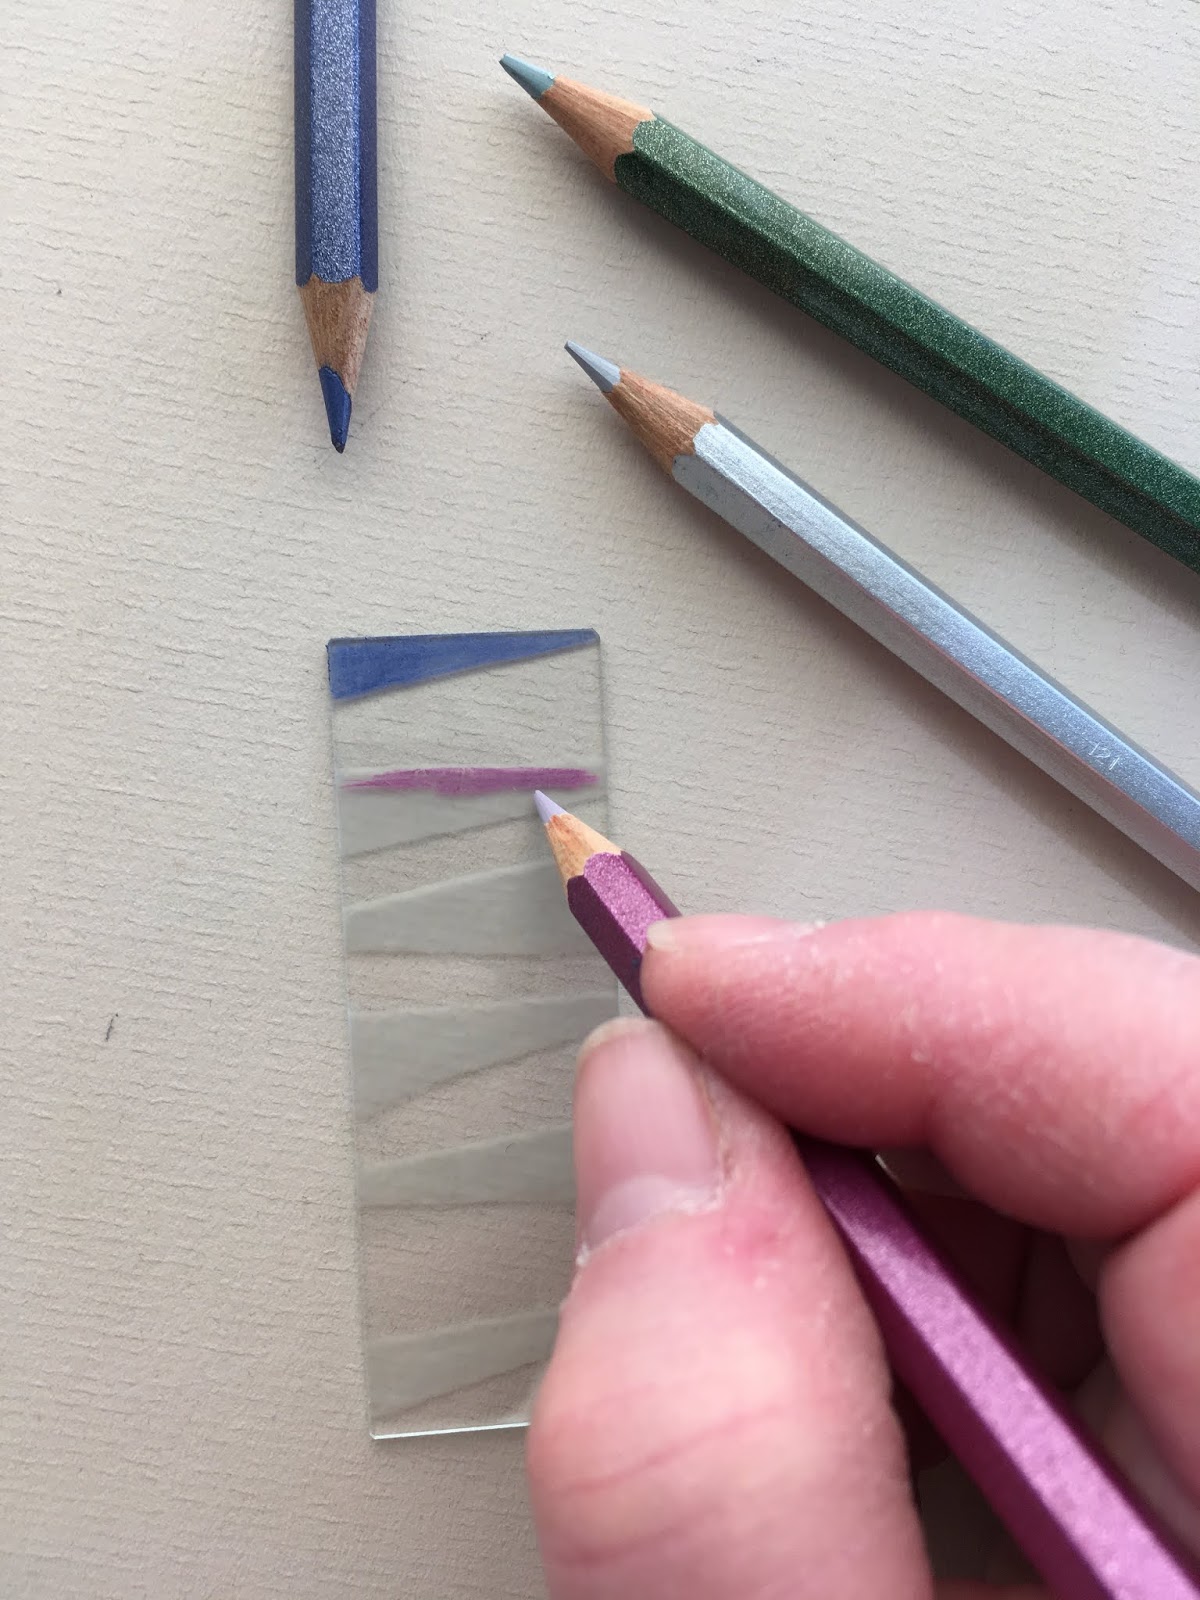
  7. If you want color on your pendant, simply color the etched areas with metallic pencils in the colors of your choice. 
     
    As you can see, I used a rainbow approach. 

  8. Apply a light, even coat of glue onto one side of the second microscope slide. (Note: I just dabbed the glue on with a piece of paper towel.) Gently position and press the glued side onto the colored side of the etched slide. Match the edges and let dry.  
  9. Cut a backing piece of felt, leather or backing material of your choice that is 2” longer and 1/2” wider than the microscope slide measurements.  Glue the glass pendant onto the backing material as shown.  
  10. Fold the top over to the back to create a casing; glue in place.  When completely dry, trim as desired.  Thread the cord through the casing.  


Disclaimer: Since the etchall Etching Creme etches porcelain, as well as glass, please do not use the creme or rinse the project in a porcelain or fiberglass sink or surface.  The best surfaces to use when doing these projects are plastic or stainless steel.

Tuesday, May 29, 2018

Add Drama to Stamping with Colored Pencil Techniques

Have you ever colored your stamped images with colored pencil and been disappointed with the results?  

Well...that is all about to change!  Just keep reading....


I have recently been experimenting and perfecting THE COOLEST color pencil technique ever!

All my stamp images are from Impression Obsession and can be found here.


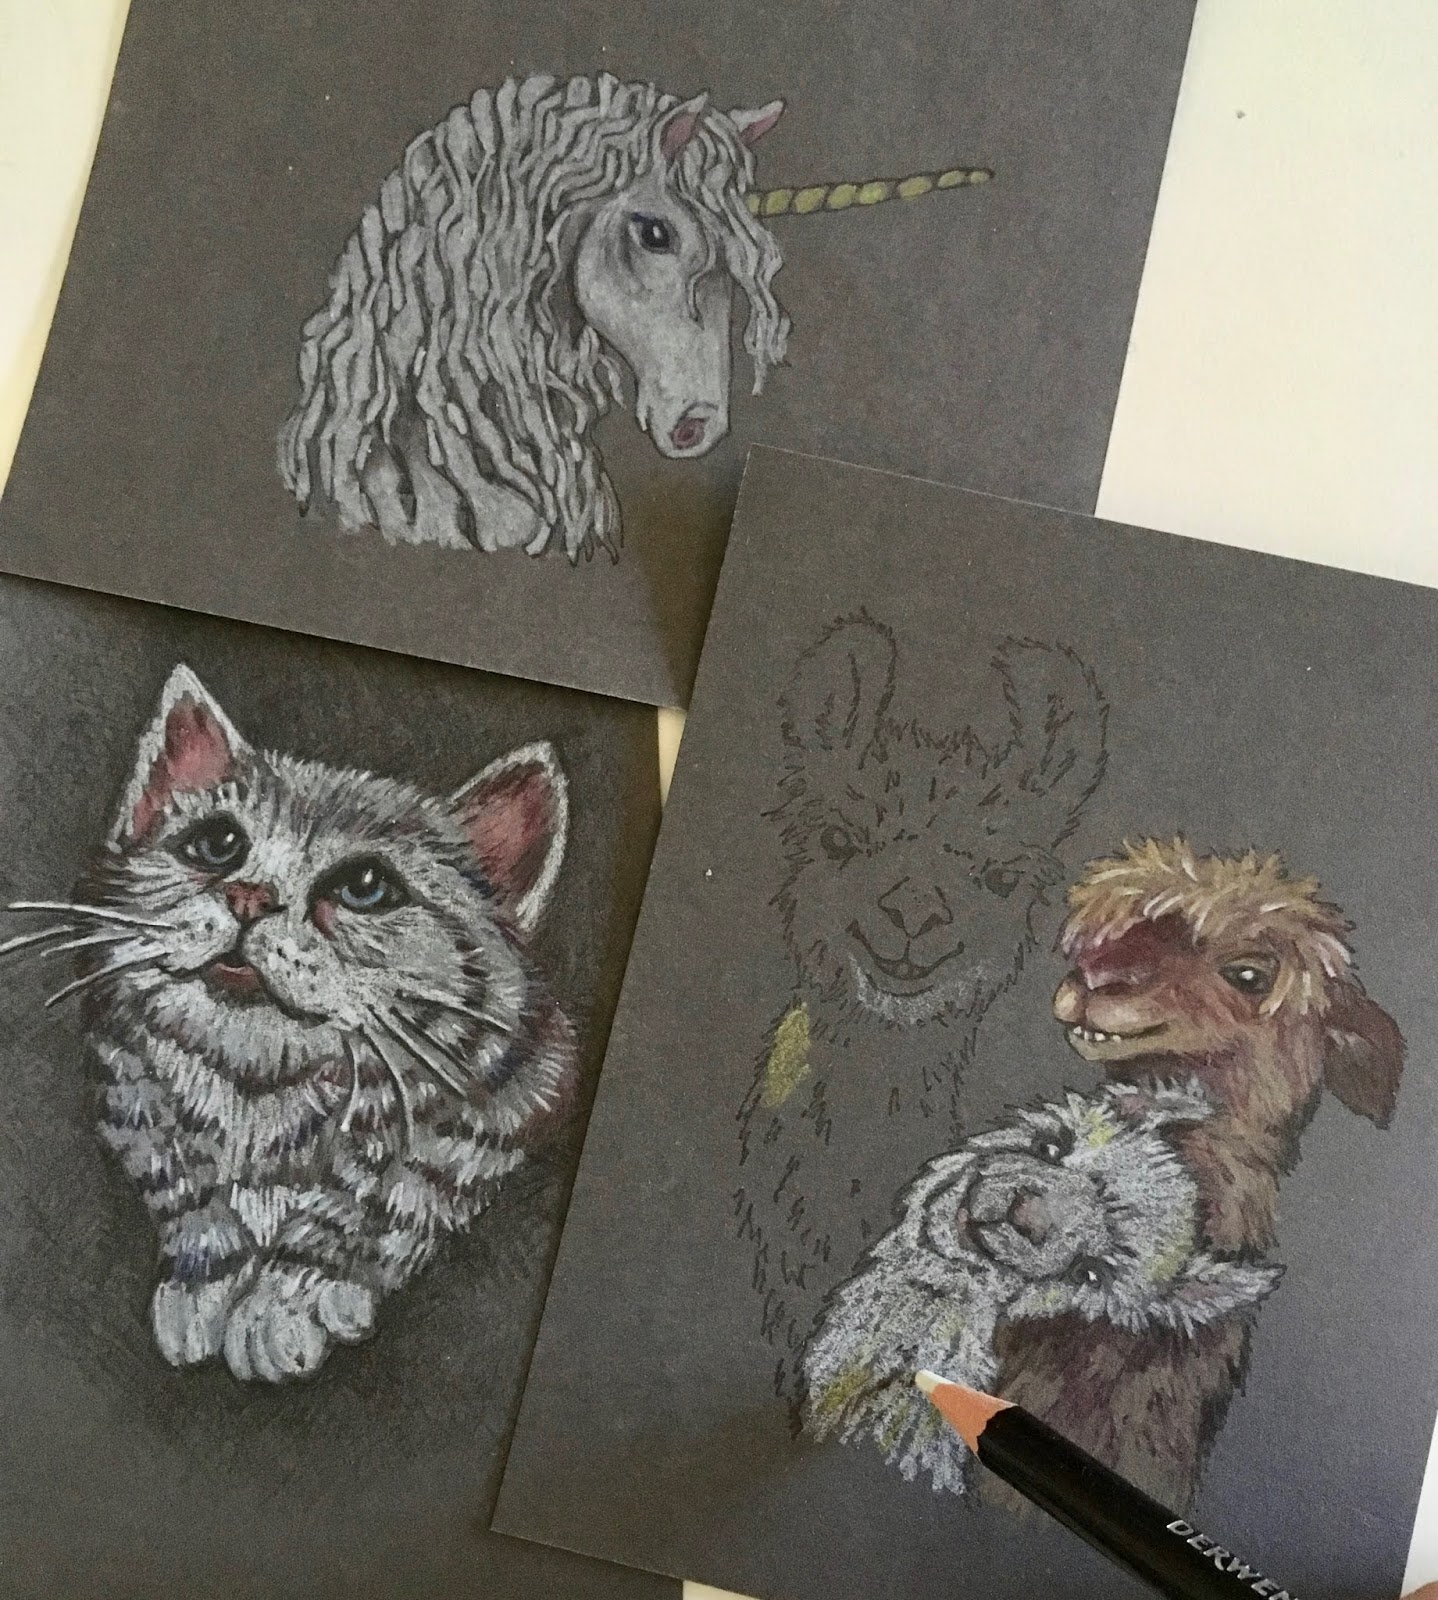
It all started as a simple serendipitous "surprise". I had stamped an image on a dark grey cardstock scrap. Yep, that was it.  I then had one of those "oh no, what do I do now" moments when I realized DUH,  how do I now add color?

Most typical coloring mediums used with paper crafts (like ink, marker and watercolor) are transparent. They don't work at all on dark surfaces.  And, while most opaque mediums like acrylic paint, pigment ink and pastel will show up on the dark cardstock, they also obliterate outline and detail lines on my stamped image.

So....I'm thinking what to do...what to do.....and then POW! Light bulb moment. How about colored pencils?! 

I quickly pulled out ALL my colored pencil tins and started experimenting with the different brands and types I had available. (Why I actually have so many different brands and types is a WHOLE other story in itself.)

 And, WOWZA!  This translucent medium really pulled it off.  Actually, more than just in an average kind of way. Truth is....they were AMAZING!


All my stamp images are from Impression Obsession and can be found here.

Colored pencils are the best of all worlds.  They work by adding translucent layer upon translucent layer until you get the color and intensity you want.  Each layer is affected by the layer beneath...and that includes the color of the substrate used beneath that very first layer. 

Then came the experimenting as I quickly discovered not all color pencils perform the same on all substrates.  Different brands AND types can work very differently.  Some are harder, some softer. Some pencils wind up with a waxy buildup (called "bloom").  The pencils in some brands and product lines seem to lay down more intense color while others need more layers to be built up for that intensity.

And then there is the variable of the actual colored cardstock.  Uncoated cardstock worked the best.  I found smooth cardstock has better results than textured cardstock simply because the stamped image is crisper plus the colored pencil often won't attach well to the indentations and grooves in the texture. Cardstock color and value (dark, mid-ground, light) will also affect the color pencil results. So, it is best to test your color palette on a small cardstock scrap before beginning an actual project.

Here comes the REALLY cool part:  You do NOT need to be an "artist" to try this technique.  And I mean you will SUCCEED when you try it!  All you need is to know basic color theory, ie, blue + yellow = green.  Primary colors are the basis for everything (red, yellow, blue)  secondary colors are made by mixing two primary colors (orange, green and purple) and complementary colors are opposite each other on the color wheel. That's it, kids. And, surprise....using a rubber stamp image even eliminates the need to be a skilled sketch artist.


All my stamp images are from Impression Obsession and can be found here.

However, I do understand that many people may still be a little intimidated by colored pencil. Since my experimenting I have developed steps to this technique that will give you confidence and insure your success. 

This first tutorial is only covers stamping and coloring on a very NEUTRAL cardstock...dark grey.  By using a dark grey "ground", we have already laid in some of the tonal shadows.  This is the perfect cardstock to choose when using images that are lighter in tonal value.

All my stamp images are from Impression Obsession and can be found here.


Here are a few tips:
1. Begin coloring using the LIGHTEST color....normally WHITE, followed by light grey, light tan, light yellow, blue, green, pink or whatever colors your piece will be.  Add your lightest and most striking highlights first.  Where desired, the highlights can cover up the stamped outline or detail.
2. Start laying in your DARKEST shadows next.  But...not everywhere.  Just where they will be the darkest.  You will add more shadow layers later.
3.  Start building layers of your mid-tone colors, adding color on top of color until you get the intensity and shade you want.  Add your lighter and deep colors again in some of the layers so they become embedded or sandwiched in between color layers.
4. End by adding a few more strokes of white highlights...and the darkest of dark shadows.
5. If you want to get "artsy" really quick, create your deep shadow tones by adding the complementary color instead of just adding black. Then add layers of the other two primary colors to blend So, basically, you add shadows using the colors MOST unlike the color of the item you are adding the shadow to.  if you add shadows to a green leaf (green is made of blue + yellow), you will also use a deep red layer to create a richer shadow. Blend with a little purple and add a little orange if desired.  Conversely, if you are adding shadows to a purple item, you should add yellow but also add the dark green and dark red to blend.  You will get the hang of it once you start experimenting.
6. Best tip is to do "practice pieces" on cardstock scraps.  I have found that the simple act of making something that "doesn't count" before doing  the final piece where there can be no mistakes, often frees up our ability to take risks and just "flow".

All my stamp images are from Impression Obsession and can be found here.

Next time on the blog, I will go into more detail covering colored pencil on amid-range colored cardstock.

All stamp images copyright by Gail Green LDL/Impression Obsession.  All content on this blog post and all posts on this blog copyright Gail Green.  Do NOT copy or use any of this content without written permission from the author and artist Gail Green.  

Friday, July 21, 2017

Summer IS my Inspiration!

I can honestly say I'm not a fan of winter.  During most of the dark, colorless weeks, my creative work becomes a cozy blanket filing my life with color when snow and cold prevents me from even wanting to go outside most day  But summer is different.  Summer is FILLED with LIFE--and it fills my senses to overflowing!


Windows open wide, I love listening to birds singing, motorcycles rumbling and the sounds of children laughing. The colors of nature...and just the warmth of the sun on my face is truly intoxicating. These gorgeous summer skies and gentle breezes tempt me daily to close my eyes to deadlines and just escape outside to soak it all in!   And...it is especially difficult to stay focused indoors here in Chicagoland when temps hover in the low to mid 80s and humidity is moist enough to soothe but not be uncomfortable.


But all of that sensory information also serves to inspire.  Despite the distractions just outside my window, my creative soul just can't stay quiet and I continue to draw, create projects, write articles and tutorials...and meet my deadlines.

My most recent articles and tutorials on the Favecrafts site are on decoupage....which is one of my crafting favorites!  I will be featuring a a different decoupage tutorial on each of the next few posts so please bookmark my site so you can see them all!


First up is an exciting "How To" Decoupage Guide"  that is jam-packed with information!  In this guide you will learn how to successfully decoupage on glass and other hard surfaces, as well as see lots of examples to get YOUR creative juices flowing!


Leave me a comment and let me know how you love to spend summer!

Friday, November 11, 2016

Interesting how I don't post much in summer because I just don't want to lose any of that precious time outside. But, the moment it starts to feel and smell like fall, I return to my regularly scheduled blogging.

So this post will be more of a social experiment than the usual sharing photos, events and updates in the lives surrounding the Green Family Craft Zoo. Mainly because this week has had drop dead gorgeous fall weather which we all know will soon come to a screeching halt, slowdown and then....end in the world again turning colorless in shades of white, black and grey.

And so I ponder, as I look outside and marvel at the brilliance of autumn...the psychedelic trees and all the orange, red, brown and yellow leaves scattered over all the beautiful green grass. Fall is one of my most productive seasons to create art because I am surrounded by color on my walks and I am inspired by the color palette when I return.  Which is why I am always sad to see the color slowly fade and disappear.


 Do we really say goodbye to summer and fall with the turning of a calendar page or the changing of the clocks? Or can we hold on to it in our hearts and experiences? In my case, I hold onto summer in my still healing broken toe...but also in the videos and photos that capture the sights, smells and sounds of nature (OH SO MUCH GREEN all around me!) and outdoor festivals, events and fun times.

Monday, May 25, 2015

Blog Hopping

And now for some FUN...combining texture and sparkle with awesome products from Stampendous and Linnie Blooms!


Linnie Blooms and Stampendous have paired up for a BLOG HOP this week!

Since I'm part of the Linnie Blooms Design Team, I came up with a pretty cool project that combines products from both companies.  Stampendous is all about stamping...Linnie Blooms is all about canvas.  Add in a few extra coloring products (Pan Pastels from Colorfin, ink from Clearsnap),and embellishment from Toner Plastic (Fun Wire)....glue (Beacon Adhesives) to hold it all together....and here we have it.....


LOVE GRAPES Note Card
By Gail Green


Materials you will need:

Stampendous:      Fran’s Jumbo Handle
                               Fran’s Encrusted Jewel Kit (Purple)
                               Cling Rubber Stamps: Jumbo Grapes
                               Clear Stamps: Life Words

Linnie Blooms:     Canvas Fall Leaves
                               Shabby Trim (Green)

Clearsnap Holdings, Inc:
      Top Boss® Watermark Ink            
      Colorbox® Archival® Inkpad (Black)

Colorfin/Pan Pastel:          
                              Sofft Applicator Handle & Heads Set
                              Sofft Art Sponge
                              Artists Painting Pastels (Magenta Shade, Violet Extra Dark, Titanium White)

Beacon Adhesives:
     Gem-tac® Permanent Glue
                              Zip Dry® Paper Glue
                              Fabri-tac ® Permanent Adhesive

Toner Plastics:    22 Gauge Fun Wire (Icy Silver)

Cardstock:           10” x 6.5” black cardstock folded and scored to form a 5 x 6.5” card
                              4-1/4” x 6” black cardstock
                              Magenta cardstock scrap

Miscellaneous:    Heat Tool, scissors, pencil, small bowl (or other small container), green acrylic paint or tinted gesso (brand and color shade of your choice), non-stick mat


Instructions:

Mix glass glitter and embossing powder from the Encrusted Jewel Kit in small bowl, as desired.
Using Watermark Ink, stamp the grape cluster on the 4.25” x 6” black cardstock.
Sprinkle the embossing powder mixture onto the stamped image, shake off excess and heat.


Using the Sofft sponge and tool to apply and blend, apply Magenta and Violet Pastels onto the grape sections as shown.  Add and blend white for highlights, beginning with a very light application and build intensity as desired. Tip: Do not cover sections completely with Pastel.  Allow the black cardstock color to show through where the darkest shading/shadows should appear.
Add Magenta and Violet around the edges of the cardstock, blending in towards the grape image.


Sponge green acrylic paint or tinted gesso onto both sides of the canvas leaves of your choice.  When almost dry, pinch and shape the leaves. Dry completely on a non-stick mat. 


Using Sofft Tool, add Violet pastel around the leaf edges and in center of leaf to define veins. 
Optional: Carefully add Gemtac along leaf edges. Sprinkle glass glitter from the Frantage Encrusted Jewel Kit onto the wet glue; dry.


Stamp phrase in black on magenta cardstock scrap.  Hand tear around the phrase. 


 Add Violet Pastel around edges with Sofft Tool


Cut a 15” section of Fun Wire. Wind around a pencil; remove.  Gently pull and shape, twisting and curling to look like a realistic tendril.

Attach stamped cardstock onto card with Zip Dry. Position the remaining layers onto card, as shown. When pleased with the arrangement, attach leaves and curled wire with Gem-tac. Attach phrase with Zip Dry.  Dry completely.


Cut 4” strip of Shabby Trim.  Apply Fabri-Tac and roll loosely between fingers, curving and shaping as you roll; dry. Attach over the wire with Gemtac; dry. 


Please leave me a comment and then return to the Linnie Blooms Blog to continue hopping! Or hop through the links below!


What a great way to start off a blog hop -- Memorial Day!

The Design Teams of Stampendous and Linnie Blooms have traded product and are ready to show you their creations!  Here's the link and schedule of postings.  Please show them your love by leaving them a comment!  Commenter's on the Linnie Blooms' Design Team blogs will be entered into a drawing at the end of the week!

Our Designers Links:


Trish Cortez

Dawn Mattson

And here are the links to the Stampendous Blog Hoppers:


At the end of the blog hop, Linnie Blooms will be giving away a FREE All New DIY Home Decor Kit!  So be sure to leave a comment on our Designer's blog to be entered to win!