Showing posts with label craft. Show all posts

Thursday, August 9, 2018

Floral Etched Glass Vase


Floral Etched Glass Vase


A simple dollar store glass vase can turn into a stunning collector’s piece in just a few minutes with etchall Etching Creme!


You will need:

etchall Etching Creme and squeegee
Large plastic container of water
Clean dry paper towels
1 large squared glass vase with flat sides
Contact paper 
Diecut machine and floral die of your choice (I used Sizzix Big Shot and Vine die)

Optional: Faber Castell Gelatos in colors of your choice and makeup sponge applicator


Here’s how:

1. Prepare your work surface. (Note: I used a combination of protective surfaces to do my project so I could photograph each step.)  Wash and dry your glass vase.   


2. Cut the vine (or other floral shape) from Contact paper.  (Note: I added a layer of cellophane to the back of the Contact paper to add stability/thicknesss and prevent sticky residue from adhering to my die cut machine.) You can do this by using a die and die cut machine OR cutting a shape by hand.


  You will have both a positive vine shape AND the negative vine piece.  For this project, you will use the negative vine.  (Note: Save the positive vine shape to use for another project!) 


3. Place the negative vine on the vase, positioned as desired.  


    Burnish securely to the glass with the squeegee.


4. Apply a generous amount of the etchall Etching Creme over the exposed areas of the slide.  Set aside for 15 minutes for the etchall Etching Creme to do its magic!


5. After 15 minutes, use the squeegee to remove the etchall Etching Creme and return the creme into the container.  Yes…the etchall Etching Creme can be used over and over and over again!  Amazing, isn’t it?!  


6. Carefully remove the negative vine and wash the glass thoroughly in a large plastic container of water.  Dry well. 


7. If you want a simple vase, you can stop here. 


8. If you want a second vine on the opposite side of the base, repeat steps 1 through 6 on the opposite side.


  Add a parrot to the display and…voile!  Instant rainforest decor! (Just kidding!)

Note:  Many of you who follow my blog are already acquainted with Ollie, my crafty companion.  One of the wonderful things about etchall Etching Creme is there are NO toxic fumes and it cleans up so easily!  Ollie watched the entire project taking place and voiced his approval many times during the process.  He is trained to “not touch” and was returned to his cage during any step that might have had potential risk to his safety and impulse control.  He was so excited to be part of the photo shoot he stepped right off my hand and on top of the vase to pose for the camera!


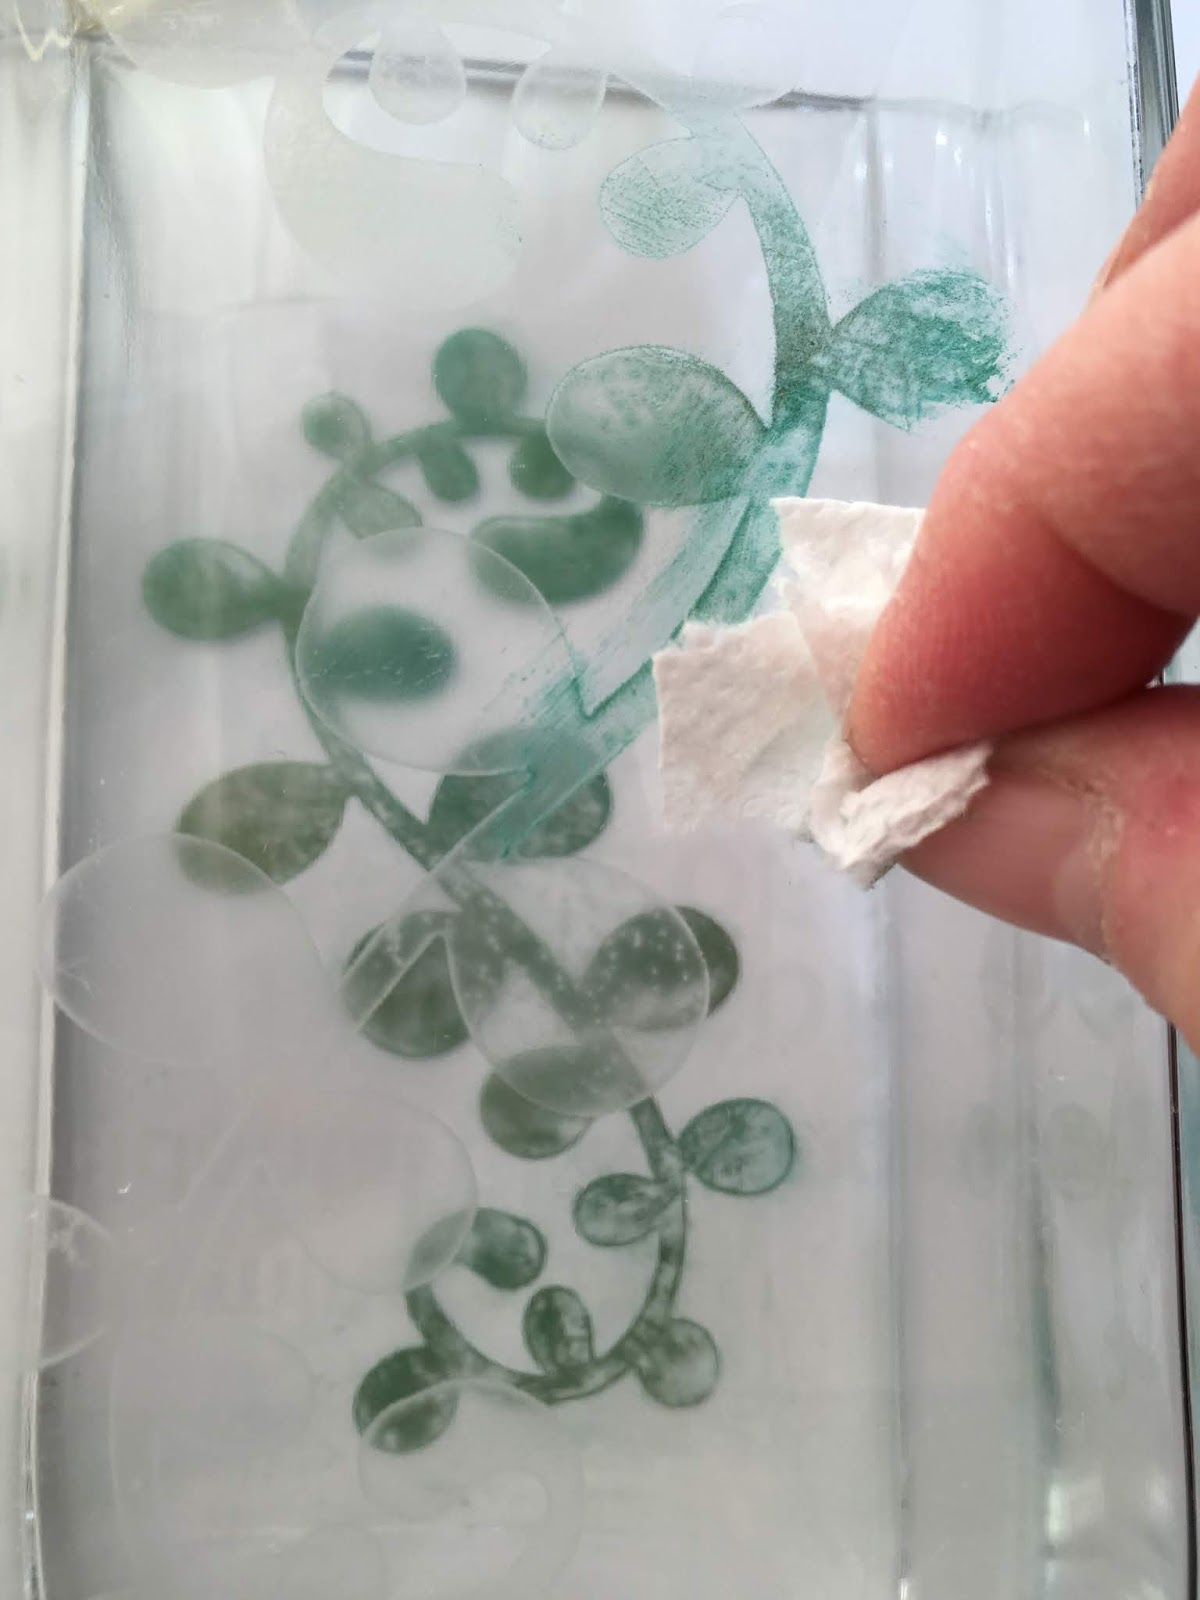
9. Creative Options: Take this gorgeous etched design one step further by adding color onto the etched areas.  


    Apply Gelatos of your choice by rubbing them onto the etched vine sections on the vase.  


    Allow to dry for about an hour and gently wipe off excess color.  


Disclaimer: Since the etchall Etching Creme etches porcelain, as well as glass, please do not use the creme or rinse the project in a porcelain or fiberglass sink or surface.  The best surfaces to use when doing these projects are plastic or stainless steel.

Thursday, July 12, 2018

Etched Glass Necklace


Etched Glass Necklace

Transform a simple microscope slide into a beautiful necklace pendant!


Etching glass changes more than just turning a transparent material into a translucent one.  It also changes the surface texture to become receptive for a variety coloring mediums. While this pendant can also be an outstanding statement in simplicity, you can also go one step further to jazz it up a notch by adding pops of color with metallic pencils.


You will need:

etchall Etching Creme and squeegee
Plastic container of water
Clean dry paper towels
2 glass microscope slides
Plastic shipping tape
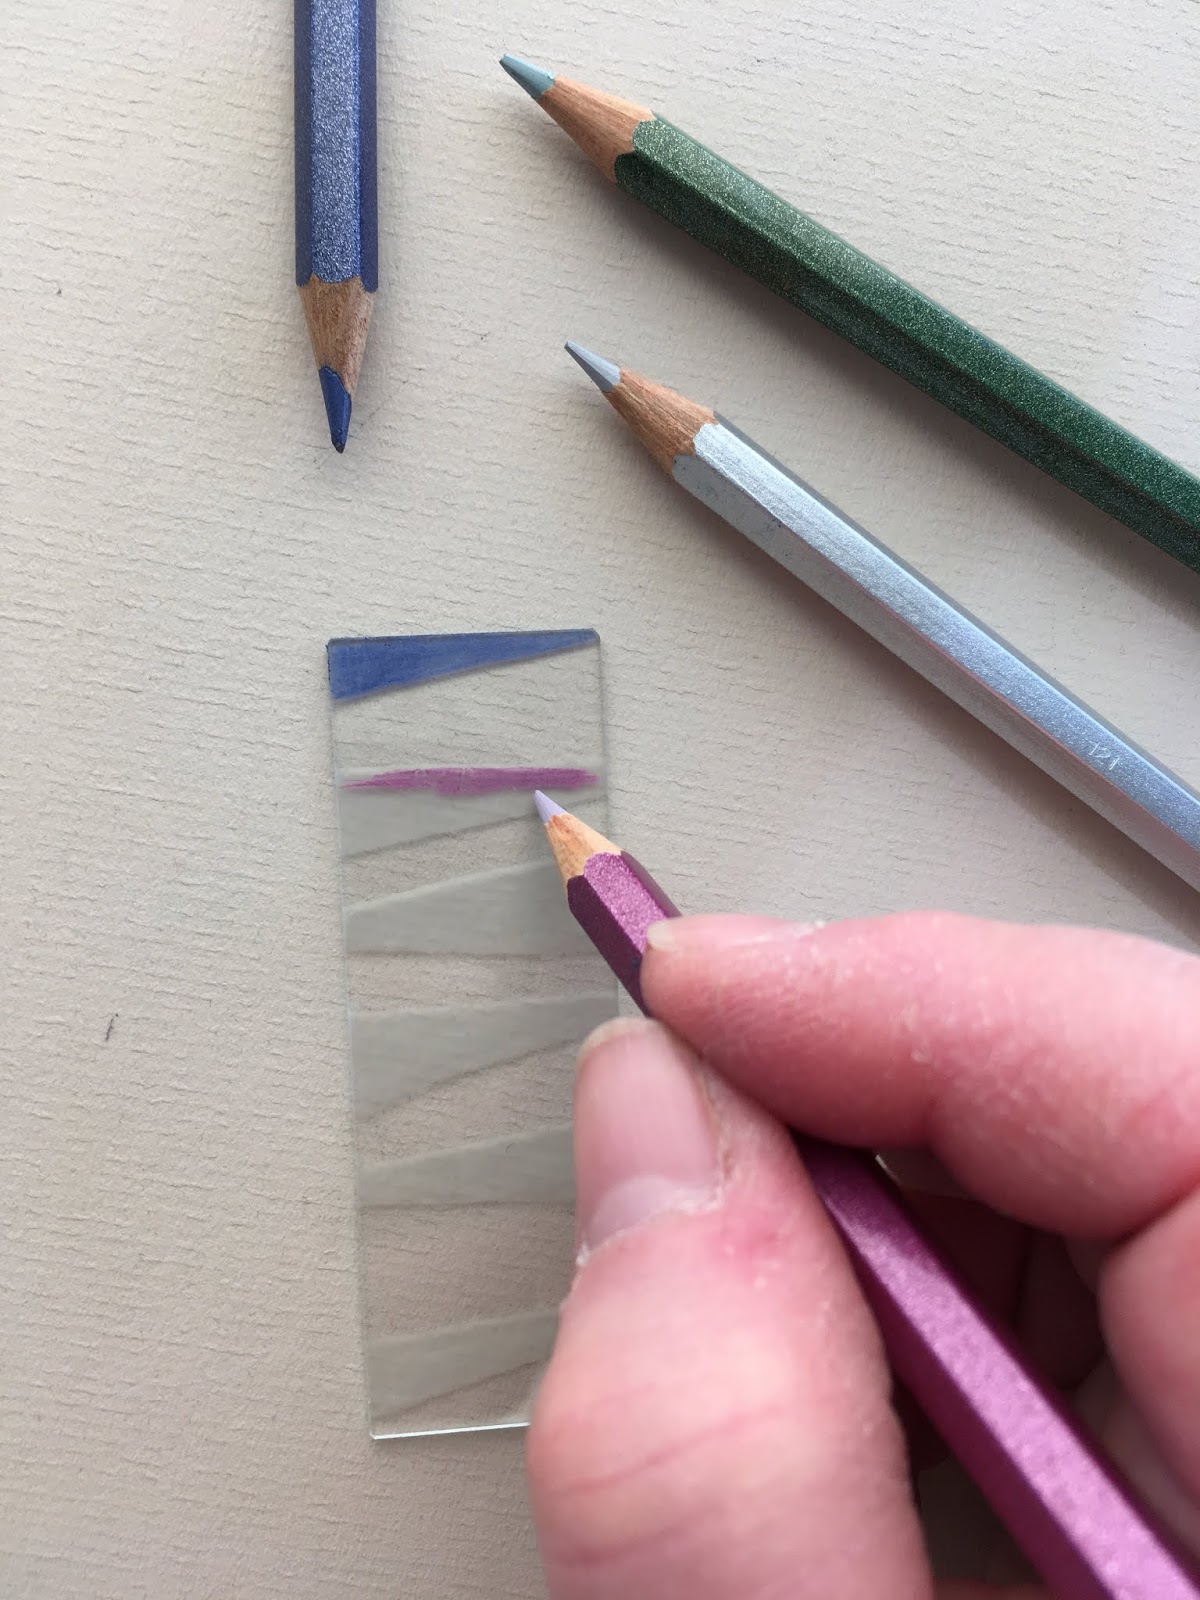
Metallic colored pencils in colors of your choice
Felt, leather or other backing material of your choice.
Adhesive for glass that dries clear 
Cord in the length of your choice


Here’s how:
  1. Prepare your work surface. (Note: I used a combination of protective surfaces to do my project so I could photograph each step.)  Wash and dry your glass microscope slides.
  2. Cut narrow angled strips of shipping tape that are wider than the microscope slide.  Position and attach to one of the slides, as desired.  
  3. Burnish the strips securely to the glass with the squeegee. 
  4. Apply a generous amount of the etchall Etching Creme over the exposed areas of the slide.  Set aside for 15 minutes for the etchall Etching Creme to do its magic!  
  5. After 15 minutes, use the squeegee to remove the etchall Etching Creme and return the creme into the container.  Yes…the etchall Etching Creme can be used over and over and over again!  Amazing, isn’t it?!  Remove and discard the tape strips and wash the glass thoroughly in a plastic container of water.  Dry well.  
  6. If you want a simple pendant, you can proceed straight to step 7.  
  7. If you want color on your pendant, simply color the etched areas with metallic pencils in the colors of your choice. 
     
    As you can see, I used a rainbow approach. 

  8. Apply a light, even coat of glue onto one side of the second microscope slide. (Note: I just dabbed the glue on with a piece of paper towel.) Gently position and press the glued side onto the colored side of the etched slide. Match the edges and let dry.  
  9. Cut a backing piece of felt, leather or backing material of your choice that is 2” longer and 1/2” wider than the microscope slide measurements.  Glue the glass pendant onto the backing material as shown.  
  10. Fold the top over to the back to create a casing; glue in place.  When completely dry, trim as desired.  Thread the cord through the casing.  


Disclaimer: Since the etchall Etching Creme etches porcelain, as well as glass, please do not use the creme or rinse the project in a porcelain or fiberglass sink or surface.  The best surfaces to use when doing these projects are plastic or stainless steel.

Friday, November 11, 2016

Interesting how I don't post much in summer because I just don't want to lose any of that precious time outside. But, the moment it starts to feel and smell like fall, I return to my regularly scheduled blogging.

So this post will be more of a social experiment than the usual sharing photos, events and updates in the lives surrounding the Green Family Craft Zoo. Mainly because this week has had drop dead gorgeous fall weather which we all know will soon come to a screeching halt, slowdown and then....end in the world again turning colorless in shades of white, black and grey.

And so I ponder, as I look outside and marvel at the brilliance of autumn...the psychedelic trees and all the orange, red, brown and yellow leaves scattered over all the beautiful green grass. Fall is one of my most productive seasons to create art because I am surrounded by color on my walks and I am inspired by the color palette when I return.  Which is why I am always sad to see the color slowly fade and disappear.


 Do we really say goodbye to summer and fall with the turning of a calendar page or the changing of the clocks? Or can we hold on to it in our hearts and experiences? In my case, I hold onto summer in my still healing broken toe...but also in the videos and photos that capture the sights, smells and sounds of nature (OH SO MUCH GREEN all around me!) and outdoor festivals, events and fun times.