Showing posts with label rubber stamping. Show all posts

Wednesday, June 19, 2019

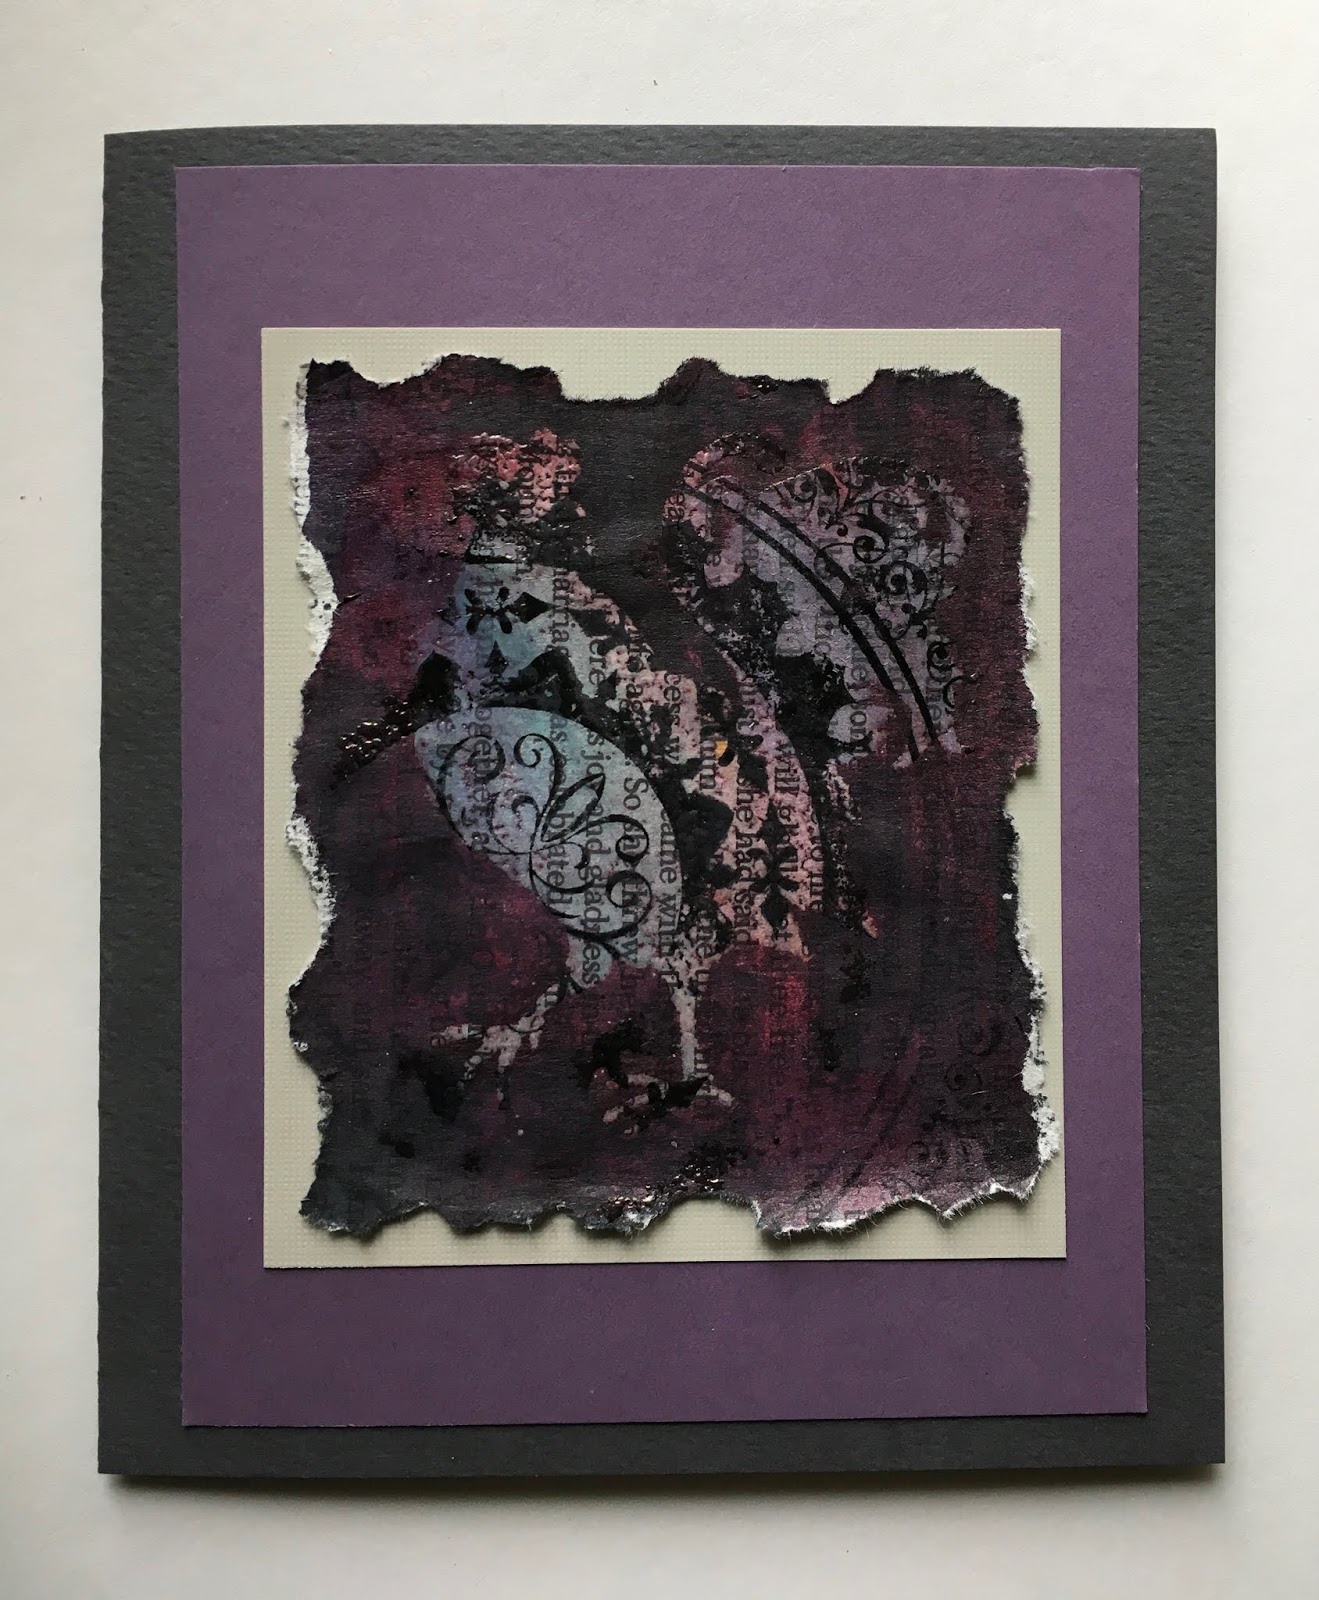
Create some BoHo Rooster MAGIC with the Embossing Resist Technique

One of the most satisfying aspects of stamping is the ability to create projects using a variety of techniques at different levels of complexity.  While my recent Boho Rooster project was done using very basic techniques, I went to a whole different level with this new project!  Using a technique I call "Embossing Resist",  I basically created a pattern using a solid silhouette stamp! It sounds complicated and looks complex but trust me, if you follow the steps outlined below, you will get the same (or equally) interesting results!


Again, I decided to use a sheet of printed text torn from an old book.  I love using printed text pages because the text is already there,...plus the paper is usually lightweight and perfect for easy ink absorption.

For this project I used Boho Mandala plus one of my new silhouette stamps from Impression Obsession -- Rooster 1.


I began by prepping my paper.  Using DTP (direct-to-paper) and sponging added color and grunge to the plain white background.  (I used Clearsnap Colorbox Archival Dye inkpads in various colors.) And since dye ink is transparent, the printed text shows right through. Another way to ink the paper is to use spray inks.  This technique does make the paper super wet which then has the potential to cause it to curl.  To keep curling at a minimum, I'll dry the paper immediately with a heat tool and then let it finish drying overnight with a heavy non porous weight (like a plastic box filled with inkpads or an old metal cookie tin) sitting on top. 

When the paper is completely dry, it's time to begin stamping.  I stamped my Boho Mandala off-the-edge an then repeated it again in the opposite corner. 


Now the fun part begins.  
To create the resist effect, I stamped my Rooster 1 in the center of the paper using clear embossing ink.  I then sprinkled clear embossing powder on top, shook off the excess and melted it with a heat tool.  The cool thing about embossing is it creates a resist to most water-based wet media.

I then sponged on additional ink around the image, making sure to use a high contrasting color.  

This technique can can be used in dozens of different ways and color/design combinations.  Sometimes it is fun to experiment and just take the opportunity to let your creative heart shine!


After a little hand tearing and layering, here is the finished project!  Beacon Adhesives Zip Dry Paper Adhesive makes the layering super easy to do.


Friday, October 19, 2018

Boo to you! Halloween is coming.....

As we slide further from sweet summertime, there is a definite chill in the air here in the Midwest. I can't help but think about how much this time of year always triggers memories of my children's Halloween fun, as well as that of my own childhood.  

Anticipation of that magical day (and sometimes entire weekend) is still contagious.  In fact, like many parents in our friendly neighborhood, I usually also get into the spirit of fun by wearing wigs or funny hats, along with orange and black clothing to greet all the trick-n-treaters that appear at my door.  On those Halloween days when the weather is drop dead gorgeous, I'll also spend hours outside greeting everyone...and just enjoying all that fun going on around me!  

But now is the time to get ready.  It's time to get that pumpkin, decorate the house....and create some cards for neighbors and friends.


For this project, I have used two of my new stamp images from Impression Obsession to create a card that will appeal to all ages--including all those "special" little pumpkins! 

Here is what you will need:

D7891 Little Witch
C7979 Scary Pumpkin 1
C7980 Scary Pumpkin 2

Clearsnap:
Colorbox®️ Premium Dye ink pads: Banana, Tangerine, Licorice
Colorbox®️Mix’d Media Inx ink pad: Jasmine
Art Dauber

Beacon Adhesives
Zip Dry®️ Paper Glue

Sizzix/Ellison:
Swirls Embossing folder

Here's what to do:

1. Apply both Banana and Tangerine ink to each of the pumpkins. Stamp along the bottom edge of a white cardstock scrap; dry.  
2. Stamp the witch in Licorice, overlapping slightly over the pumpkin(s). Cut angled corners.  3. Dab Licorice around all the edges of both the stamped layer and a purple notecard; dry.
4. Pressure emboss a black cardstock scrap. Lightly dab Jasmine pigment ink over the raised sections; dry. 
5. Attach all the layers to the card using Zip Dry®️ Paper Glue.

I just LOVE it when I can use up scraps from my stash!


Sunday, October 14, 2018

Basic Stamping Techniques for Beginning Stampers


Cats on the Edge is a very simple card, drawing on very basic stamping techniques.  This is the kind of card that is PERFECT for a beginner stamper to do!  And, since there is no coloring involved, it is also a super quick card to make. The same Art Dauber technique used in my previous blog post is also used here to create a cheerful background.  


Both the E7983 Black Cats and E7840 Web Border are from my stamp line with Impression Obsession Rubber Stamps.  Clearsnap's Colorbox®️ Premium Dye ink pads (Tangerine, Grape, Licorice) are used, along with Beacon Adhesives Zip Dry®️ Paper Glue.

Simply stamp the Web Border on a white cardstock scrap in Grape; stamp the Black Cats over the border using Licorice. Punch rounded corners. Dab Tangerine around edges with an Art Dauber.  Cut an orange cardstock layer and dab Licorice around the edges.  Use Art Daubers to create the random colorful dots on the notecard.  Attach all the layers with Beacon Adhesives Zip Dry®️ Paper Glue.

Additional embellishments can be added as desired.  I just added a strip of coordinating ribbon but you could also add a small spider, stars or a phrase.  Just use your imagination!

Comments always welcome!

Tuesday, October 9, 2018

Oh no! Is Autumn Already in the Air?!

Summer is barely out the door but autumn is already in the air!  I already see trees turning color here in Chicagoland....and we are all feeling the chill in the air enough to turn our furnaces on now at night and add that extra blanket.

So....what's a girl to do but give in to the season ahead and start stamping some HALLOWEEN cards!  Somehow, that seems to make the chill of the season a lot less spooky.....

I thought I would start with one of my latest stamps from Impression Obsession Rubber Stamps....

D7982 MUMMY!

(I never could draw scary....so it's a CUTE mummy!)


I used TWO fun techniques in this card.  

First I stamped the Mummy on a white cardstock scrap with Licorice Colorbox®️ Premium Dye ink pad.  Then, instead of lifting the stamp up, I rotated it so I got additional impressions that gave it a look of movement.  How fun is this look!

Next, I grabbed some Art Daubers and had some play time on the notecard!  I created a random pattern using Colorbox®️ Premium Dye ink pads (Banana, Tangerine, Grape).  Then attach the layers with Beacon Adhesives

Zip Dry®️ Paper Glue.

Please let  me know how you like these techniques and project by leaving me a comment….


Thursday, September 27, 2018

Mastering the Art of the Silhouette Stamp

Mastering the Art of the Silhouette Stamp

I LOVE the ease and simplicity of combining colorful backgrounds with silhouette stamps! There are SO many cool, inky techniques that can be used to create backgrounds.  And those backgrounds can really "pop" with a simple solid silhouette image (or images) stamped over them.

And then the mad stamping scientist in me wondered: "What would happen if the silhouette stamp image was also approached as we do the background?  What if I turn that solid silhouette into a colorful image with defined sections using both color and dimension?"

And just like that....a fun inky embossing technique was born!


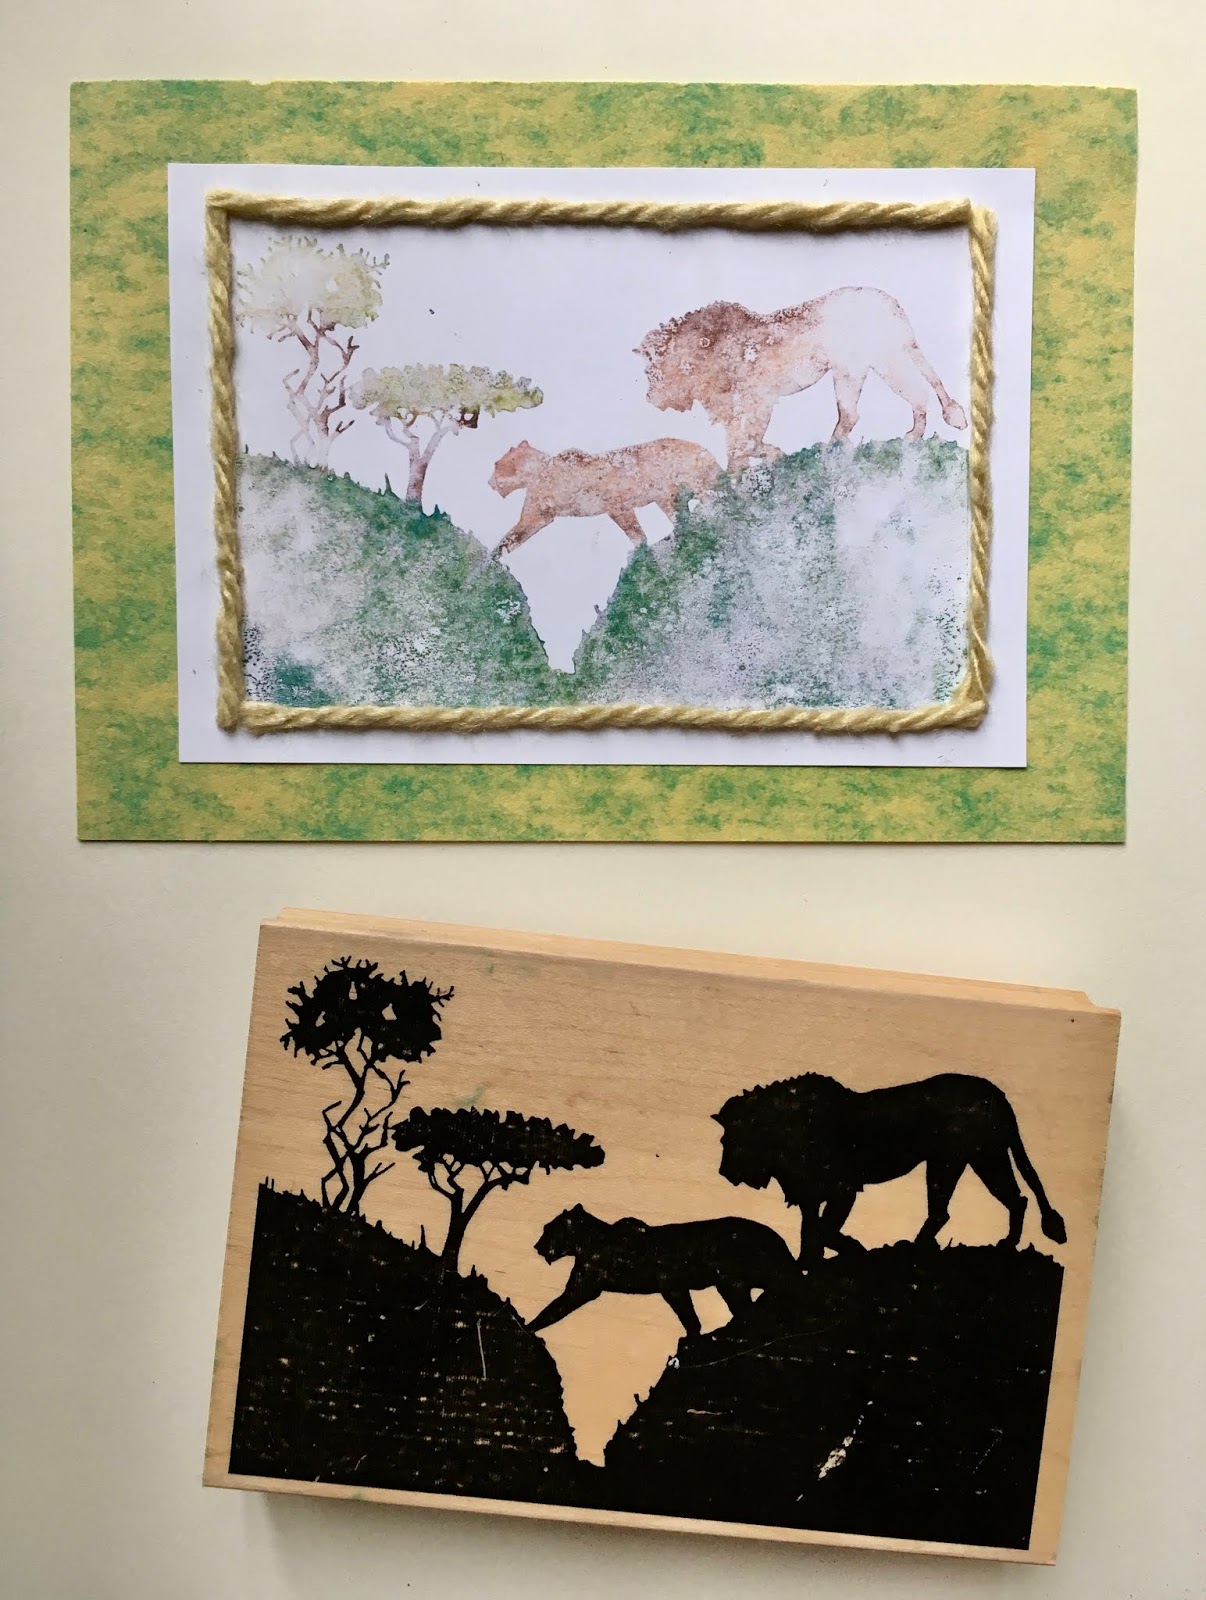
As you can see, the stamp I used was a nicely detailed solid silhouette which makes a great statement when stamped in black ink over a multitude of backgrounds.  (This stamp is from an image I drew for Impression Obsession Rubber Stamps.)  However, adding color to the actual image, along with heat embossed dimension changes not only the entire look, but also the process.  Instead of overstamping the silhouette image onto a colorful background that has already been created, the background is actually created last with this technique.  


Here is how....

Lion Stroll Card


Supplies:

     J7950 Lions
     CC234 Bark

Clearsnap:
    Colorbox®️ Petal Point Classic Pigment Inkpad (Arboretum, Envy)
    Colorbox®️ Embossing Powder (Clear)
    Top Boss®️ Embossing Stamp pad
    Colorbox®️ Premium Dye ink pads: Banana, Tangerine, Guava, Grape, Blueberry
    Colorbox®️ Archival Dye ink pads: Mudslide, Seattle Sky
    Art Daubers

Beacon Adhesives:
    Zip Dry®️ Paper Glue

    Premium Tacky Glue

Heat tool
White, tan, black and decorative cardstock.
Yarn or ribbon trim


Instructions:


  1. Place Lion stamp rubber side up. Remove desired color sections from the Petal Point inkpads. Using the tip of each section, apply ink directly to the Lions stamp, blending as desired.
  2. Stamp the lions onto 4" x 6" white cardstock. Pour clear embossing powder over the image; tap off excess.  Heat until melted. 
  3. Beginning in the center with Banana, use Art Daubers to apply Premium Dye ink. Use the remaining colors in the order in which they are listed to create a sunrise sky. Since the lions were heat embossed, that clear embossed layer acts as a resist mask so the dye ink only sticks to the area around the lion image.  
  4. Apply Seattle Sky and Mudslide on the Bark stamp; stamp image onto a 5" x 7" tan notecard. 
  5. Trim remaining cardstock; attach all the layers to card using Zip Dry®️ Paper Glue.


And then there was the surprise "Bonus" card.  


Since pigment ink remained on the Lion stamp after the initial stamping step, I wanted to first "stamp off" the ink before using my ink cleaner pad. Then I decided to experiment.  Instead of just using scrap paper, I decided to "stamp off" the image onto a piece of coated white cardstock.  While the resulting image is not the densely colored, crisp image we saw in the first card, the "stamp off" image had instead a softer, more ethereal look with an interesting painterly quality.  I then paired this stamped image with a soft background cardstock and wheat yarn trim (attached around the image using Premium Tacky Glue).  I love surprise inky techniques and am SO very pleased with this second "bonus" card!   

What do you think about these two fun looks using Silhouette stamps???!!!


Tuesday, May 29, 2018

Add Drama to Stamping with Colored Pencil Techniques

Have you ever colored your stamped images with colored pencil and been disappointed with the results?  

Well...that is all about to change!  Just keep reading....


I have recently been experimenting and perfecting THE COOLEST color pencil technique ever!

All my stamp images are from Impression Obsession and can be found here.


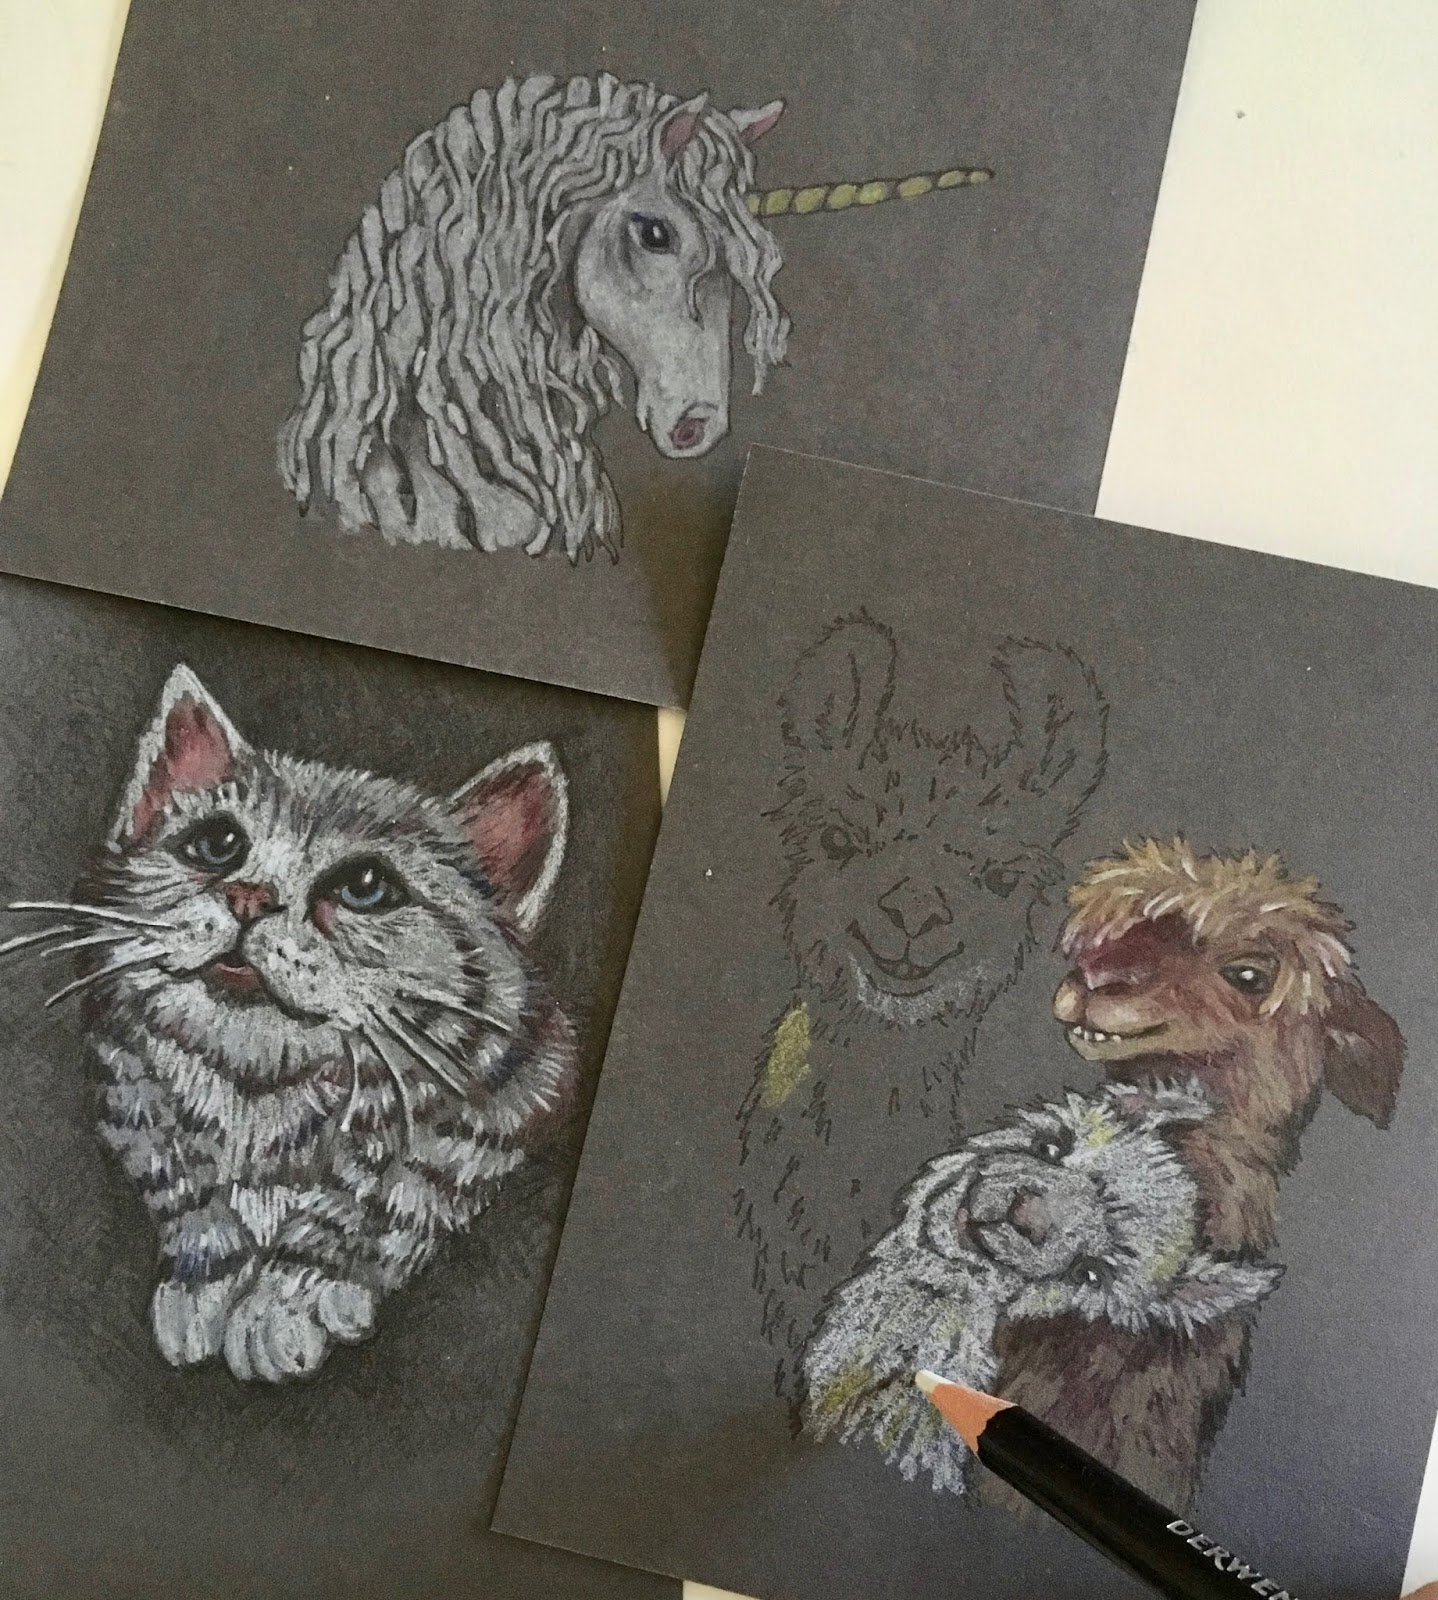
It all started as a simple serendipitous "surprise". I had stamped an image on a dark grey cardstock scrap. Yep, that was it.  I then had one of those "oh no, what do I do now" moments when I realized DUH,  how do I now add color?

Most typical coloring mediums used with paper crafts (like ink, marker and watercolor) are transparent. They don't work at all on dark surfaces.  And, while most opaque mediums like acrylic paint, pigment ink and pastel will show up on the dark cardstock, they also obliterate outline and detail lines on my stamped image.

So....I'm thinking what to do...what to do.....and then POW! Light bulb moment. How about colored pencils?! 

I quickly pulled out ALL my colored pencil tins and started experimenting with the different brands and types I had available. (Why I actually have so many different brands and types is a WHOLE other story in itself.)

 And, WOWZA!  This translucent medium really pulled it off.  Actually, more than just in an average kind of way. Truth is....they were AMAZING!


All my stamp images are from Impression Obsession and can be found here.

Colored pencils are the best of all worlds.  They work by adding translucent layer upon translucent layer until you get the color and intensity you want.  Each layer is affected by the layer beneath...and that includes the color of the substrate used beneath that very first layer. 

Then came the experimenting as I quickly discovered not all color pencils perform the same on all substrates.  Different brands AND types can work very differently.  Some are harder, some softer. Some pencils wind up with a waxy buildup (called "bloom").  The pencils in some brands and product lines seem to lay down more intense color while others need more layers to be built up for that intensity.

And then there is the variable of the actual colored cardstock.  Uncoated cardstock worked the best.  I found smooth cardstock has better results than textured cardstock simply because the stamped image is crisper plus the colored pencil often won't attach well to the indentations and grooves in the texture. Cardstock color and value (dark, mid-ground, light) will also affect the color pencil results. So, it is best to test your color palette on a small cardstock scrap before beginning an actual project.

Here comes the REALLY cool part:  You do NOT need to be an "artist" to try this technique.  And I mean you will SUCCEED when you try it!  All you need is to know basic color theory, ie, blue + yellow = green.  Primary colors are the basis for everything (red, yellow, blue)  secondary colors are made by mixing two primary colors (orange, green and purple) and complementary colors are opposite each other on the color wheel. That's it, kids. And, surprise....using a rubber stamp image even eliminates the need to be a skilled sketch artist.


All my stamp images are from Impression Obsession and can be found here.

However, I do understand that many people may still be a little intimidated by colored pencil. Since my experimenting I have developed steps to this technique that will give you confidence and insure your success. 

This first tutorial is only covers stamping and coloring on a very NEUTRAL cardstock...dark grey.  By using a dark grey "ground", we have already laid in some of the tonal shadows.  This is the perfect cardstock to choose when using images that are lighter in tonal value.

All my stamp images are from Impression Obsession and can be found here.


Here are a few tips:
1. Begin coloring using the LIGHTEST color....normally WHITE, followed by light grey, light tan, light yellow, blue, green, pink or whatever colors your piece will be.  Add your lightest and most striking highlights first.  Where desired, the highlights can cover up the stamped outline or detail.
2. Start laying in your DARKEST shadows next.  But...not everywhere.  Just where they will be the darkest.  You will add more shadow layers later.
3.  Start building layers of your mid-tone colors, adding color on top of color until you get the intensity and shade you want.  Add your lighter and deep colors again in some of the layers so they become embedded or sandwiched in between color layers.
4. End by adding a few more strokes of white highlights...and the darkest of dark shadows.
5. If you want to get "artsy" really quick, create your deep shadow tones by adding the complementary color instead of just adding black. Then add layers of the other two primary colors to blend So, basically, you add shadows using the colors MOST unlike the color of the item you are adding the shadow to.  if you add shadows to a green leaf (green is made of blue + yellow), you will also use a deep red layer to create a richer shadow. Blend with a little purple and add a little orange if desired.  Conversely, if you are adding shadows to a purple item, you should add yellow but also add the dark green and dark red to blend.  You will get the hang of it once you start experimenting.
6. Best tip is to do "practice pieces" on cardstock scraps.  I have found that the simple act of making something that "doesn't count" before doing  the final piece where there can be no mistakes, often frees up our ability to take risks and just "flow".

All my stamp images are from Impression Obsession and can be found here.

Next time on the blog, I will go into more detail covering colored pencil on amid-range colored cardstock.

All stamp images copyright by Gail Green LDL/Impression Obsession.  All content on this blog post and all posts on this blog copyright Gail Green.  Do NOT copy or use any of this content without written permission from the author and artist Gail Green.  
Thursday, July 27, 2017

Living in the Moment

Hooray for today! Summer is still here and I'm loving every magic moment that presents itself.

Living with dogs for over 25 years has taught me more than just how to teach a puppy to sit and stay. Dogs, you see, have mastered the art of "living in the moment".  This skill is counter-intuitive to our deadline driven society and, sometimes I even think, to our human nature of planning ahead and dwelling on the past.


In reality, every day is a treasure of its own, to be savored and enjoyed to its fullest. Sometimes that means stopping whatever we are doing and just being still. Quiet the brain, relax and focus on the moment instead of the "next" and the "next", ad infinitum.  It means it is sometimes okay to just "be". That is the only time the "off" switch appears so the creative side of my brain can actually turn off, even if just for a few minutes or hours.

And that's why I love summer so much.  There is so much magic in so many warm moments.  After I take those little "just be" breaks, the "creative" cranks right up again into high gear. I find I am refocused with a clearer vision. Deadlines also transform into exciting challenges instead of exhausting drains.  That is mighty powerful stuff!

Meanwhile, I'm still glowing from my latest projects and published articles and tutorials for Favecrafts.com.


As promised, here is the link to my recent tutorial published on Favecrafts.  This tutorial features THREE projects and three different approaches to decoupage on wood hangers!

The projects are SO much fun to do and sure to brighten up anyone's closet.  A great project to encourage kids to hang up their coats and clothing items--especially if they decoupage their own personalized hangers.

These decorated hangers would also be a perfect gift item either given as a set or accompanying a special item of clothing.


Sunday, April 2, 2017

Mixed Media Recycled Box for Pet Lovers!

Do you love mixing media AND repurposing items as much as I do?  I'm not sure if it is the accessibility of materials, being frugal or having a social conscience about landfills but there is just something about combining recycling with mixed media that gets my creative juices flowing!

So here is a fun way to recycle bits and pieces in your craft "stash" to create a little treasure box, using easy peasy crafty techniques!  While the example below sports an image of a kitty, feel free to use your favorite dog image instead!
Note: This project was published in the recent spring issue of "Just Mixed Media" magazine (Scott Publications)


Materials you will need:

Empty small  metal, cardboard or paper mache box of your choice
Impression Obsession Rubber Stamps: Uh Oh #A7510
                                                               Rosie & Bandit #F7531
                                                               Fur with Brains #B7506
Clearsnap: Colorbox® Archival Dye inkpads (Wicked Black, Saddle, Pumpkin Pie, Squash)
                  Art Dauber
Beacon AdhesivesZip Dry® Paper Glue 
                                Gem-Tac® Permanent Glue 
                                Fabri-Tac® Permanent Adhesive
Acrylic craft paint (white)
2" chipboard circle
Scraps of white and black cardstock
Ribbon or other fiber trims of your choice
Printed text scrap from book, newspaper or magazine

Instructions:

1.  Using Art Dauber, apply thin coat of white paint to chipboard circle; smooth edges and dry. Stamp the Kitty in black; dry.  Dab black ink around edges to grunge; dry completely.
2.  Measure and cut one strip of printed text and one strip of white cardstock to fit around the sides of the box. Take each strip and crinkle it in your hand; relax strips and lay flat on your work table. Using Direct-to-Paper (DTP) technique, apply Saddle to to text strip and Pumpkin Pie to the white cardstock strip. Glue crinkled text strip to box.
3.  Stamp "Fur with brains" on white crinkled scrap; trim and attach.
4.  Apply Squash DTP to remaining printed text scrap. Measure around the lid and hand tear scrap to fit. When dry, attach to lid with Zip Dry.
5.  Measure and cut a strip of black cardstock to fit around side of lid; attach. Cut ribbon to fit and attach with Fabri-tac.
6. Glue stamped chipboard circle on top of lid as shown, using Gem-Tac.
7. Stamp "Uh Oh" on ribbon scrap; attach to top as shown.

Friday, December 16, 2016

And here is the article on Monotones!

Aren't I being good?!  Another article....this time in the December 2016 issue of Scrap & Stamp Arts magazine.....

This article was a challenging one since I limited myself to ONLY using black, white and gray.  At the same time, it was also very rewarding because I love limits.


A peek at some of the projects in the article!


While exploring the possibilities I discovered how much fun it was to use inky techniques with embossing folders.  (Embossing folders used are from Sizzix/Ellison.....)


Wednesday, November 16, 2016

Creating Curiosity Shadowboxes

Some of you have been asking for me to post when a craft project or article is published. As new feature on my blog, I will be posting whenever new issues and articles in Scrap & Stamp Arts magazine (or any other publication) are available.

So, without further adieu.....here is the latest!

Check out the November/December 2016 issue of Scrap & Stamp Arts magazine for my latest article on creating Curiosity Shadowboxes!

A sneak peek below! All the projects include materials that are part of most crafter's craft "stash", as well as recycled/repurposed items.

If you love the stamp images, check them out at Impression Obsession  Just search under Artist and then my name....

Enjoy!


Tuesday, March 1, 2016

Super Nova Craft Explosion!

Most people dread deadlines. Ok some types of deadlines fill me with dread and the instant desire to find ways (ANY ways) to procrastinate.  Like doing taxes or making a doctor appointment.  But....deadlines that involve creating art or writing articles filled with lots of creative projects fill me with an instant desire to move full throttle into high creative mode!

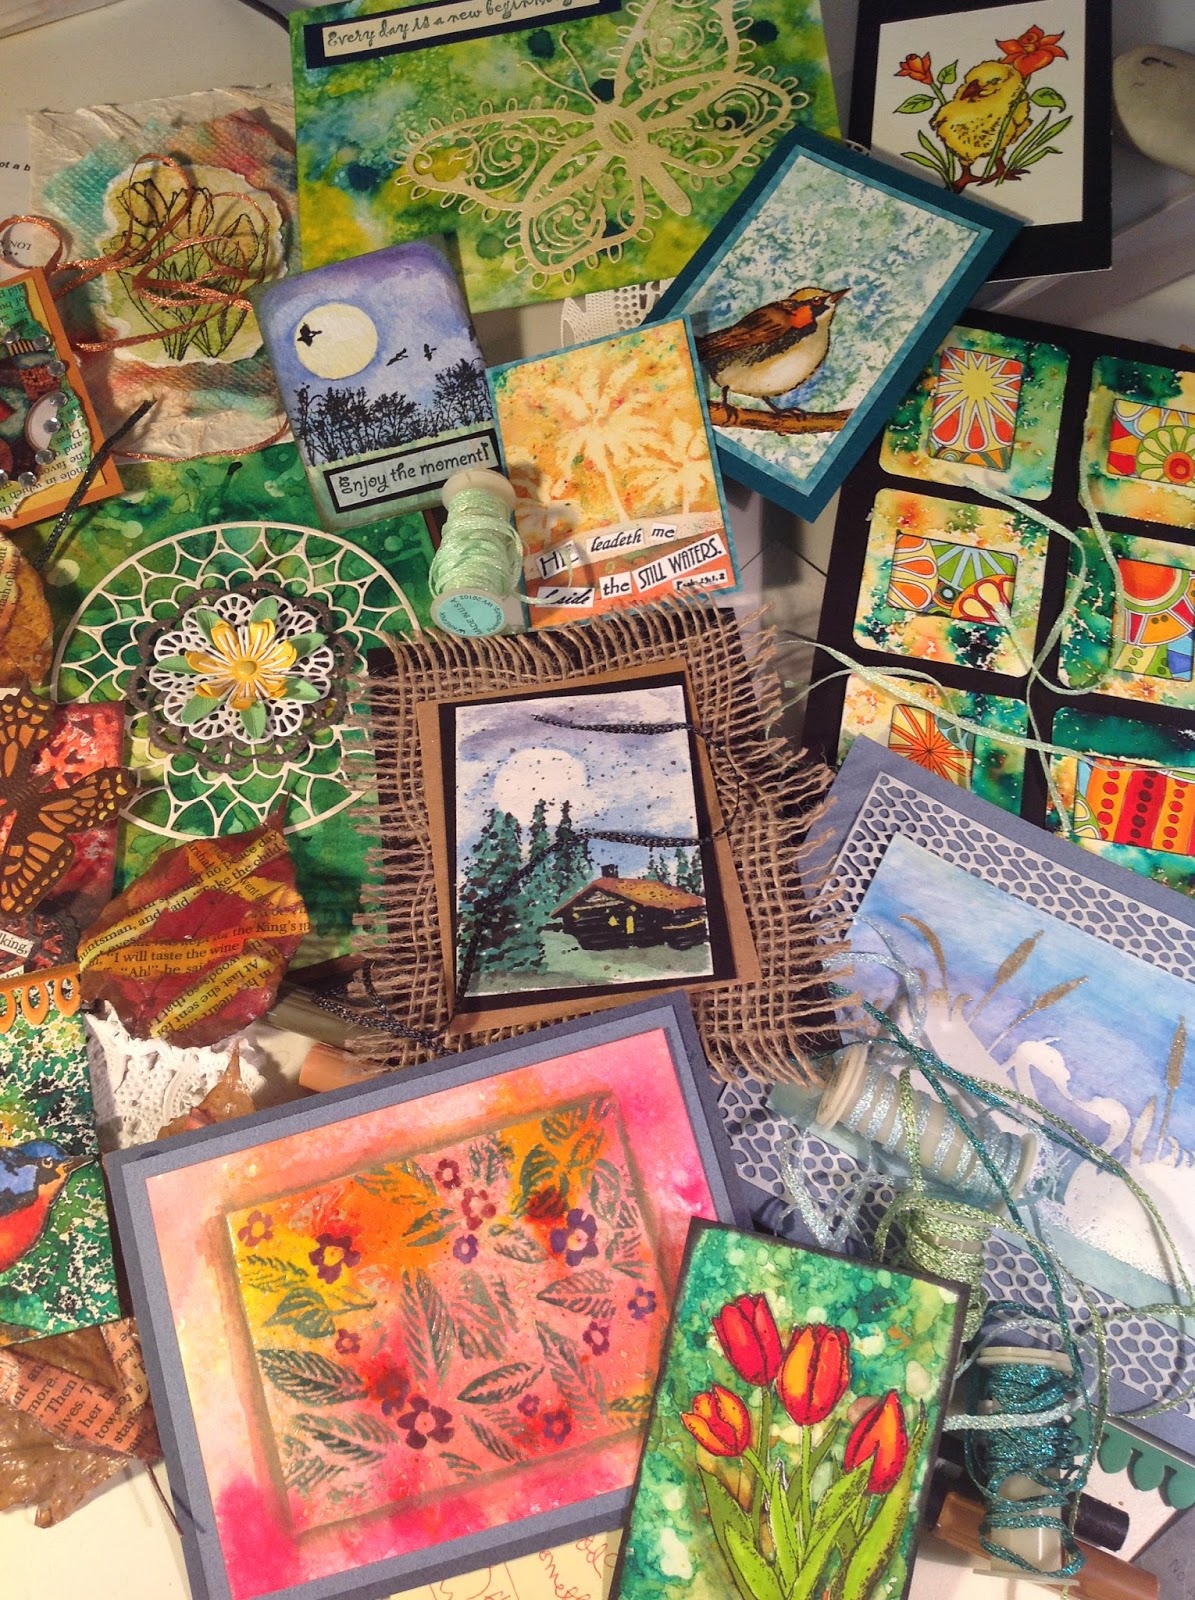
Which is exactly what I did this past weekend.  Two magazine articles and multiple projects for a third magazine later...this is what just a corner of my craft room looked like....


And another corner.....the spillover still in process to be completed this week....


IT IS a SUPER NOVA CRAFT EXPLOSION!  Wowza....


Keep your eyes out for Scrap & Stamp Arts magazine.....and Just Minis, a brand new magazine!

But meanwhile, check out the latest issue of Scrap & Stamp Arts magazine www.scottpublications.com/ssa/  and Just Mixed Media! scottpublications.com/jcmag/ for some of my latest published creations.....

And, of course in addition to the images above, check out more of my latest stamps at Impression Obsession.... iostamps.com ...Just search under Rubber Stamps > By Artist> Gail Green and you will see all my cool images!


Tuesday, August 18, 2015

Brat

After almost 4 months of nonstop PC computer, internet, modem,  and router problems...plus battery backup battery deciding to die in the midst of all of the program malfunctions, unexplained power blips and surges..and Acronis highjacking nightmares, I am now the proud owner of a sleek new iMac.  Okay, the modem and routers are still being affected periodically by Comcast pushing new ISP numbers through weekly and causing signal malfunctions but at least I know how to correct them now. And weekly power blips and surges are still a mystery (at least,according to Com Ed, despite special town hall meetings with dozens of angry users).  Battery has been replaced and we are still trying to completely resolve the Acronis issues but....

I have a pretty new iMac.  And I'm learning this new platform as quickly as my ole brain allows.  Also as quickly as I can in the time restraints I have to deal with since I STILL spend some time almost daily with random internet, modem, power blips, etc.  At least I am no longer spending ALL my time dealing with these issues.

My biggest fear was that my PC wouldn't cooperate long enough to allow the Apple tech to transfer data to the new iMac.  In fact, it totally malfunctioned 20 minutes after I got the call that the new computer had arrived at the Apple Store and they were ready for me to bring in the PC. My plan to bring it in that evening fizzled when the PC froze (yet again) when I tried to shut it down.  By the time I did the hard shut down, rebooted to make sure it still functioned and hadn't just totally crashed and then shut down again, it was too late.  The theme of the entire summer....spending ALL my time dealing with a tantrum throwing, misbehaving computer.  And so I loaded the PC in my car in the morning, took one look at it and told it  to BEHAVE!  And realized yes, now I'm speaking to my computer because it has been behaving like a total BRAT!

And that is how Brat got its name.  Very fitting, eh?