Showing posts with label creative paper crafts. Show all posts

Monday, October 29, 2018

Boo Witch for Halloween

And now it is almost time for that magical day when kids (and adults who still think like kids) are transformed into all KINDS of costumed characters, celebrities, animals, creatures and clever concepts.

I hope your Halloween is a safe and happy one -- filled with lots of treats, decent trick n treat weather ....and one in which memories are made to last a lifetime.  

In my final Halloween card for the season, I thought I would incorporate some easy, fun techniques that give added texture and sparkle...plus the illusion of movement. 


Here's what you will need:


Impression Obsession Rubber Stamps 

D7981 Little Witch
H7759 Spooky Trees

Clearsnap
Colorbox®️ Archival Dye ink pad: Wicked Black
Top Boss®️ Embossing Stamp pad
Colorbox®️ Embossing Powder (Gold)

Beacon Adhesives
Zip Dry®️ Paper Glue
Premium Tacky Glue

Heat Tool
Frame Die of your choice
Wood or chipboard letters painted black


Here's how to make it:

1. Cut out a frame from black cardstock and an oval from orange cardstock.

2. Stamp Little Witch on orange oval.  Before lifting stamp, carefully rotate it to the left and then to the right. Lift and remove stamp.

3. Stamp top portions of the Spooky Trees on the letters using the Embossing stamp pad.  Heat emboss with gold powder.  

4. Attach all layers as shown using Zip Dry Paper Glue.  Attach the letters with Premium Tacky Glue; dry.


If you enjoyed all these fun Halloween projects this month, please leave me a comment!  And if you have any special technique or project requests, just let me know!

Tuesday, October 23, 2018

Witch Pumpkin?

How could it ever be fall without....pumpkins?!  Not only are these plump orange veggies an important ingredient for pies and other harvest recipes, pumpkins are just such an important symbol in the whole Halloween experience.  In fact, I'm not sure which experience is my favorite. 

And...which one is your favorite? Is it the quest to pick out the perfect pumpkin, the act of pumpkin carving, or the actual night of trick n treating (shoulder to shoulder with little ghosts, goblins and princesses)...and being "wowed" by all the cool jack o lanterns everywhere?!  It is SO hard to choose so I guess I just have to pick them all!  LOL!

So I decided to combine one of the brand new stamp images I drew for Impression Obsession with one of my fun Cover-A-Card background stamps to create a card that captures everything.  Memories of pumpkins in the farm fields, carving those funny faces and then seeing all those porches and glowing windows filled with happy face pumpkins. 

Can you smell that faint whiff of autumn in the air.....and pies baking? Mmmmmm....


Here's what you need:

Impression Obsession Rubber Stamps 

E7978 Happy Pumpkins
CC263 Spider in Web

Clearsnap
Colorbox®️ Archival Dye ink pad: Wicked Black

Derwent: 
Academy Watercolor Pencils and Water Soluble Markers

Beacon Adhesives

Zip Dry®️ Paper Glue

Corner punch of your choice

Here's what to do:

1. Stamp Happy Pumpkins on light orange card stock. Color with pencils and markers, using a waterbrush or paintbrush to blend colors and add a shadow under the pumpkins. 

2. Stamp Spider in Web on purple notecard.

3. Punch corners of orange layer.  Attach all layers to notecard with Zip Dry Paper Glue. 

Creative Option:  No need to stop here with a notecard!  You can also create this basic design and use to decorate home decor items such as a box, wood plaque, framed print or trick n treat bag! 


Thursday, September 27, 2018

Mastering the Art of the Silhouette Stamp

Mastering the Art of the Silhouette Stamp

I LOVE the ease and simplicity of combining colorful backgrounds with silhouette stamps! There are SO many cool, inky techniques that can be used to create backgrounds.  And those backgrounds can really "pop" with a simple solid silhouette image (or images) stamped over them.

And then the mad stamping scientist in me wondered: "What would happen if the silhouette stamp image was also approached as we do the background?  What if I turn that solid silhouette into a colorful image with defined sections using both color and dimension?"

And just like that....a fun inky embossing technique was born!


As you can see, the stamp I used was a nicely detailed solid silhouette which makes a great statement when stamped in black ink over a multitude of backgrounds.  (This stamp is from an image I drew for Impression Obsession Rubber Stamps.)  However, adding color to the actual image, along with heat embossed dimension changes not only the entire look, but also the process.  Instead of overstamping the silhouette image onto a colorful background that has already been created, the background is actually created last with this technique.  


Here is how....

Lion Stroll Card


Supplies:

     J7950 Lions
     CC234 Bark

Clearsnap:
    Colorbox®️ Petal Point Classic Pigment Inkpad (Arboretum, Envy)
    Colorbox®️ Embossing Powder (Clear)
    Top Boss®️ Embossing Stamp pad
    Colorbox®️ Premium Dye ink pads: Banana, Tangerine, Guava, Grape, Blueberry
    Colorbox®️ Archival Dye ink pads: Mudslide, Seattle Sky
    Art Daubers

Beacon Adhesives:
    Zip Dry®️ Paper Glue

    Premium Tacky Glue

Heat tool
White, tan, black and decorative cardstock.
Yarn or ribbon trim


Instructions:


  1. Place Lion stamp rubber side up. Remove desired color sections from the Petal Point inkpads. Using the tip of each section, apply ink directly to the Lions stamp, blending as desired.
  2. Stamp the lions onto 4" x 6" white cardstock. Pour clear embossing powder over the image; tap off excess.  Heat until melted. 
  3. Beginning in the center with Banana, use Art Daubers to apply Premium Dye ink. Use the remaining colors in the order in which they are listed to create a sunrise sky. Since the lions were heat embossed, that clear embossed layer acts as a resist mask so the dye ink only sticks to the area around the lion image.  
  4. Apply Seattle Sky and Mudslide on the Bark stamp; stamp image onto a 5" x 7" tan notecard. 
  5. Trim remaining cardstock; attach all the layers to card using Zip Dry®️ Paper Glue.


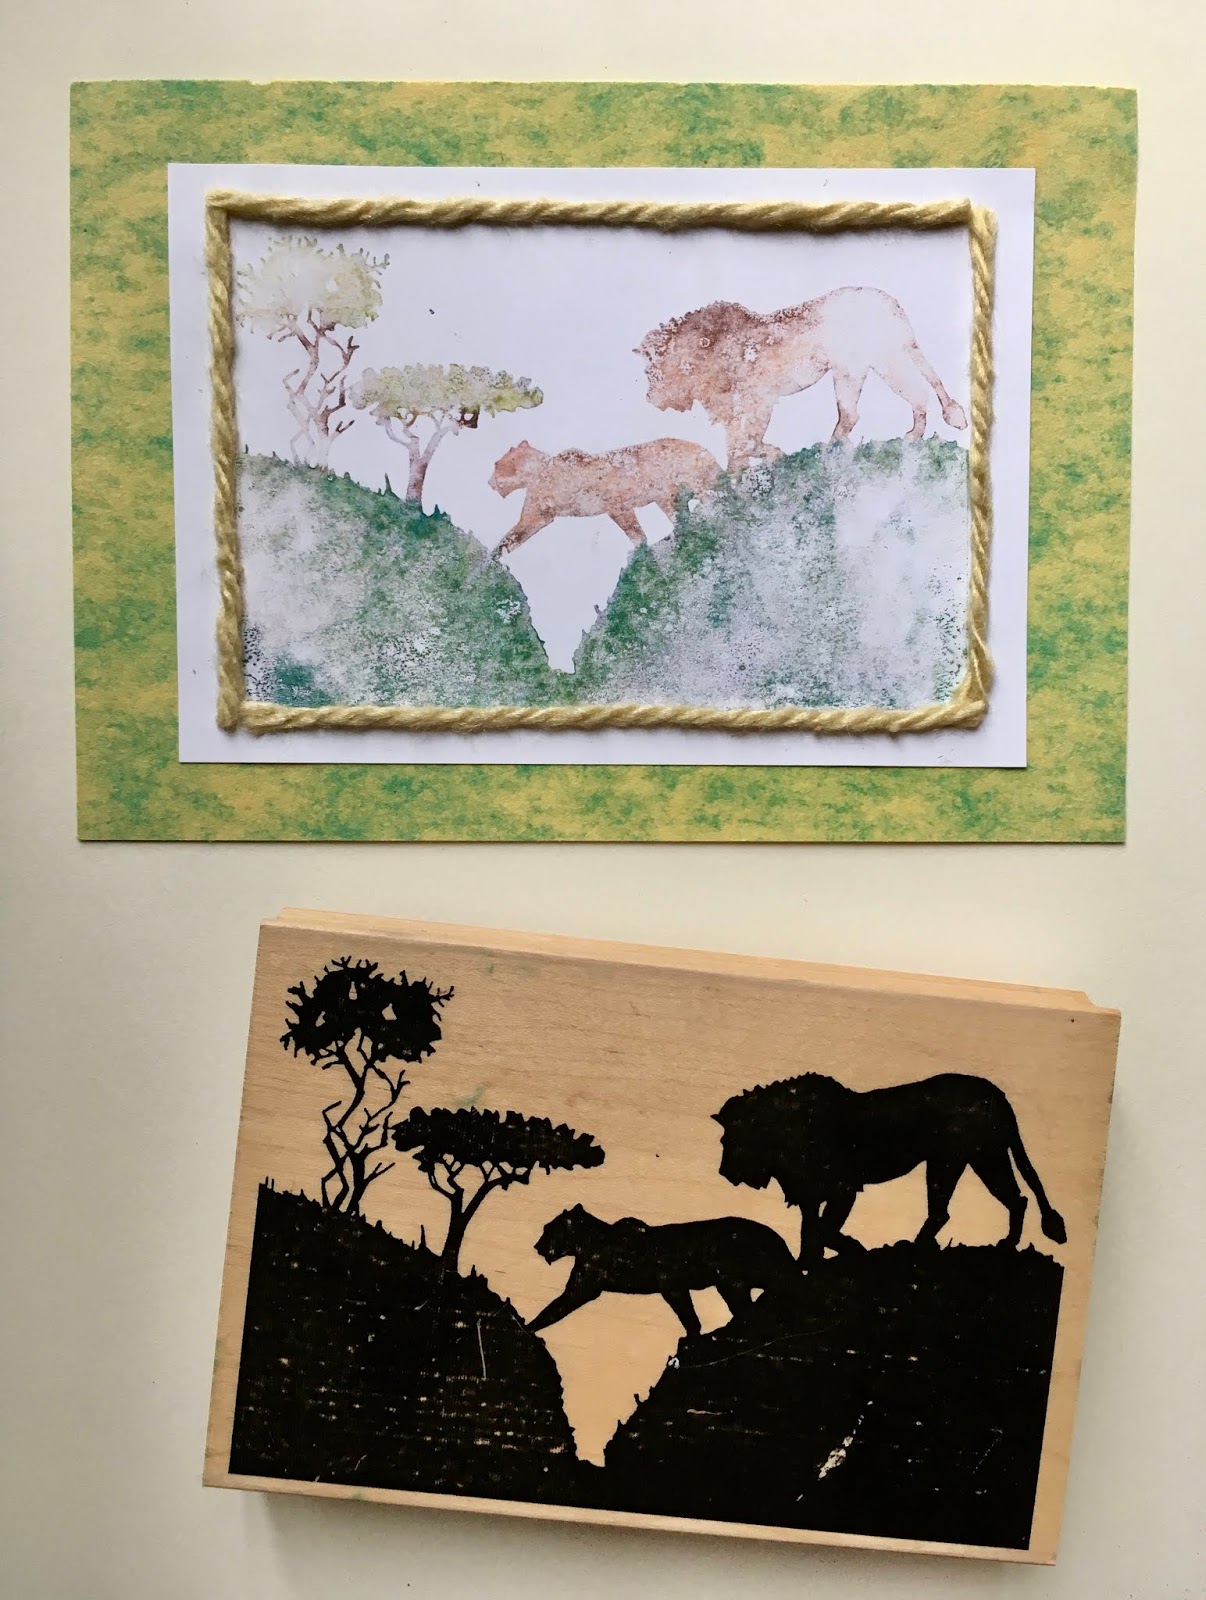
And then there was the surprise "Bonus" card.  


Since pigment ink remained on the Lion stamp after the initial stamping step, I wanted to first "stamp off" the ink before using my ink cleaner pad. Then I decided to experiment.  Instead of just using scrap paper, I decided to "stamp off" the image onto a piece of coated white cardstock.  While the resulting image is not the densely colored, crisp image we saw in the first card, the "stamp off" image had instead a softer, more ethereal look with an interesting painterly quality.  I then paired this stamped image with a soft background cardstock and wheat yarn trim (attached around the image using Premium Tacky Glue).  I love surprise inky techniques and am SO very pleased with this second "bonus" card!   

What do you think about these two fun looks using Silhouette stamps???!!!