Explore the Kaleidoscope Embossing Technique!
This easy inky technique will help you create realistic images that resemble a dimensional painting!

Same technique for both cards but the card below also includes the textured Baked Texture Embossing Powders...and different Impression Obsession stamps for a slightly different background.

Cats in a Row Cards
Supplies:
Impression Obsession Rubber Stamps
E7983 Black Cats
3160-LG Twinchies 4
G7762 Leafy Branches
Clearsnap
Colorbox®️ Petal Point Classic Pigment Inkpad (Arboretum, Metallic)
Colorbox®️ Embossing Powder (Clear)
Top Boss®️ Embossing Stamp pad
Colorbox®️ Archival Dye ink pads: Mudslide, Saddle, Seattle Sky, Putty, Wicked Black
Art Daubers
Beacon Adhesives
Zip Dry®️ Paper Glue
Emerald Creek
Baked Texture Embossing Powders by The Altered Page (Dirty Sand, Ancient Amber, Rocky Road, Chunky Rust)
Heat tool
White, tan and brown cardstock
Instructions:

Version 1
- Remove desired color sections from the Petal Point ink pads. Using the tip of each section, apply ink directly to the Black Cats stamp, blending as desired.
- Stamp image onto 3” x 6 1/4” white cardstock. Pour clear embossing powder over image, tap off excess. Heat until melted.
- Apply Putty around edges direct-to-paper (DTP) by angling inkpad and pressing repeatedly off the edge in a random pattern.
- Using an Art Dauber, apply Saddle around the edges of the card. Place the short card edge onto the Mudslide inkpad. Angle slightly and quickly pull the card edge across the inkpad. Repeat for all 4 edges.
- Trim, score and fold tan cardstock to create a 4 1/4” x 7 1/2” notecard. Stamp Leafy Branches in a random pattern around the front of the card.
- Using Zip Dry Paper Glue, attach layers.
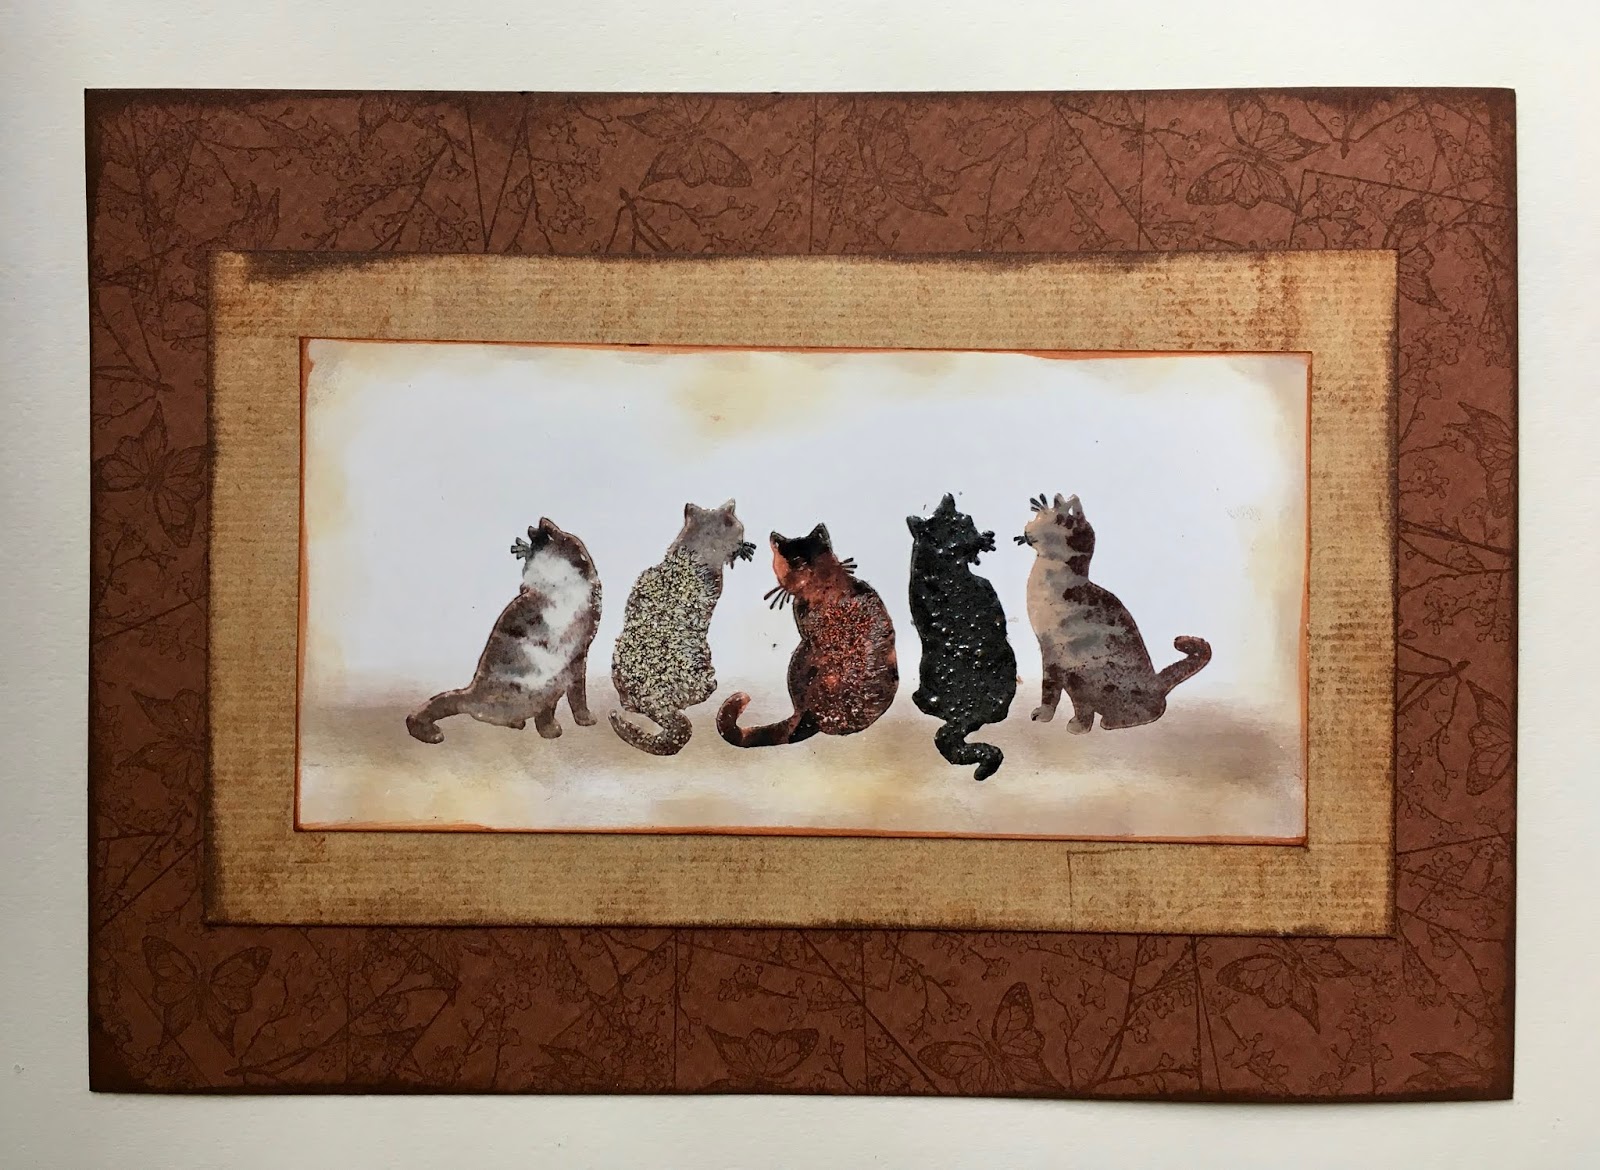
Version 2 (with Baked Texture Embossing Powders added)
- Remove desired color sections from the Petal Point ink pads. Using the tip of each section, apply ink directly to the Black Cats stamp, blending as desired.
- Stamp image onto 3” x 6” white cardstock. Carefully pour on the Baked Powder colors and textures in sections of your choice. Carefully tap off excess powder. (Note: Less is more!) Pour clear embossing powder over remaining sections of the image, tap off excess. Heat until melted.
- Using an Art Dauber, apply Putty and Seattle Sky across the bottom edge of the card, as shown. Add Putty and Seattle Sky lightly around the edges, as well.
- Place the short card edge onto the Saddle inkpad. Angle slightly and quickly pull the card edge across the inkpad. Repeat for all 4 edges. Repeat this step to apply Mudslide around the edges.
- Apply Saddle to 4” x 7” tan cardstock direct-to-paper (DTP) by wiping inkpad across. Add Mudslide and Wicked Black to edges using the DTP method in step #4
- Trim, score and fold brown cardstock to create a 4 1/4” x 7 1/2” notecard. Using Wicked Black, stamp Twinchies 4 butterfly images in a random pattern around the front of the card.
- Attach layers to notecard with Zip Dry Paper Glue.
3 comments:
Gail, the versions of cats was genius! I never would have thought to use the powders like that.
Thank you SO much, Emerald Creek! I have only begun to explore what I can do with these cool textured powders and will continue to incorporate them in more projects on my blog and elsewhere!
Love how you used the Baked Textures. Brilliant idea!
Post a Comment