I am currently putting final touches on a book manuscript due at the publisher after the holidays. That means I will soon be taking off my writer's hat and replacing it with my designer/illustrator's cap.
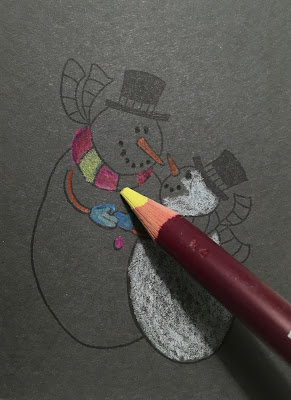
The next 4-6 weeks will include creating new art for my next rubber stamp release with Impression Obsession, along with creating oodles of cards and other stamped projects with stamps from my latest images. Here's just a small peek at my new D7881Snowman !
So, beside deadlines--and pre-trade show season--we are also smack in the middle of the holiday season! Whew!
Has the craziness of the holiday season gotten to you yet like is has to me? All I want to do right now is de-stress and disappear by doing a little creative play! (No calories or high risk behavior side effects other than inky fingers and a totally trashed studio...lol!)
The biggest question is always...where to begin!? I'm still mourning for summertime (sniff) but not yet deep into hibernation winter mode. We have no snow on the ground here in Chi-town, so my strongest Christmas inspiration this year will be from my new winter stamp images!
One of my very favorite things to do is to explore with color. And, since the students in my weekly drawing class are currently working in color pencil, I have color pencil on my mind. From the results, I'd say my F7886 Holiday Goose agrees color pencils make a really good play choice!
It is really fun to do things out of the ordinary so I decided to begin by stamping on colored cardstock. The great part about this technique is that the actual color of the cardstock becomes a tonal value influencer for the final piece. What that means is the color of the cardstock will show through the color pencil layers and influence the overall color value of the piece.
Here is how I started:
I stamped on grey cardstock using Wicked Black Colorbox Archival dye ink (Clearsnap). Once the stamped image dried, I added black pencil to the eyes and mouth. I did that to prevent any white pencil strokes from obliterating those features since the pencil will tend to dim the ink beneath. Once I laid down some basic color strokes, I returned with a second pencil layer and blended colors together using pressure and stroking in multiple directions to blend. I kept going until the image was colored. As you can see, I stroked pencil right over some of the outline but left the outline visible in other areas. Then I went back and darkened some of the black areas in the hat and added some lighter grey shading details on the snowmen and the snow beneath them. I even added both white and light grey snow falling from the sky.
Then, I decided to try the same image on a lighter, smoother cardstock. Same pencil approach, different result! Pretty cool eh?!

I repeated the same experiment using my F7886 Holiday Goose stamp image. First the dark grey cardstock...then on the lighter, smoother cardstock.
In both versions, you can see how the color of the cardstock becomes the tonal and color value influence in the final piece.
I just LOVE how I achieved two totally different looks just by using different cardstock and colors! Both of these pieces will make beautiful cards and other projects!
While the results looks very skilled, the technique is actually very easy. Of course, my stamp images give you the basic image without your needing the drawing skills.
Sshhh...don't tell anyone! Just enjoy the praises you will get when you try this color pencil technique!
(Any questions? Please comment...)


2 comments:
Love your experiment with the colored pencils. :)
Thank you< Heidi Stamps! I love experimenting with different coloring techniques and this one is just SO much fun to do!
Post a Comment